A shortlist is only useful once the client has seen it. From any AI Match list or Manual Match folder, one button creates the campaign, builds a link the client can open, and lines up the email.
Before you start
- The shortlist is the one you want the client to see. Remove anything you would not show them.
- You can open the contact. A contact shared with you as view-only cannot receive a campaign.
- The contact has an email address if you plan to send by email.
From an AI Match list
- Open Listing Match. It opens on AI Match.
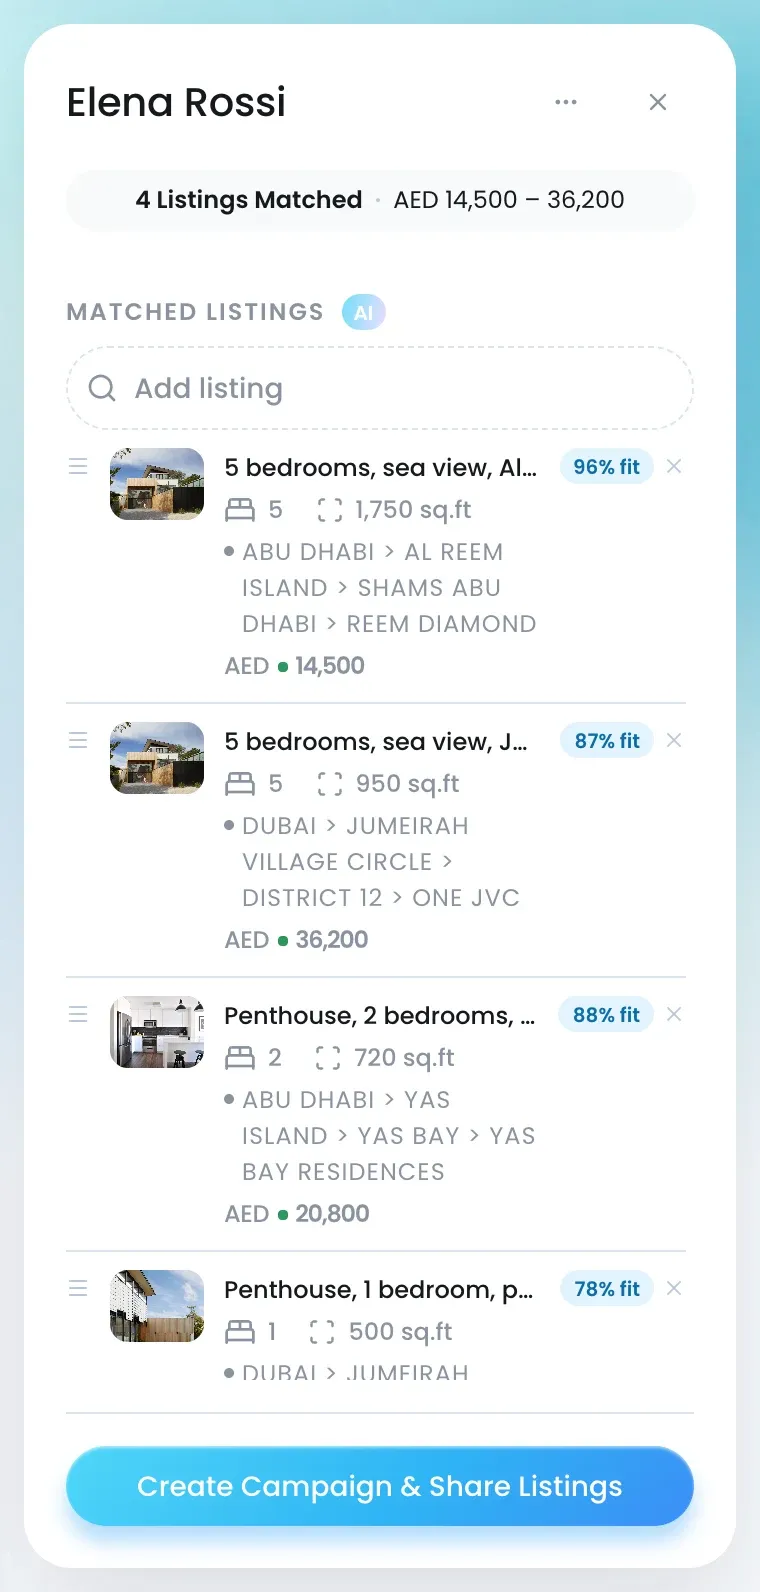
- Click the contact’s card. The list opens on the right.
- Tidy the list: click × to drop a listing, or Add listing to bring one in.
- Click Create Campaign & Share Listings.
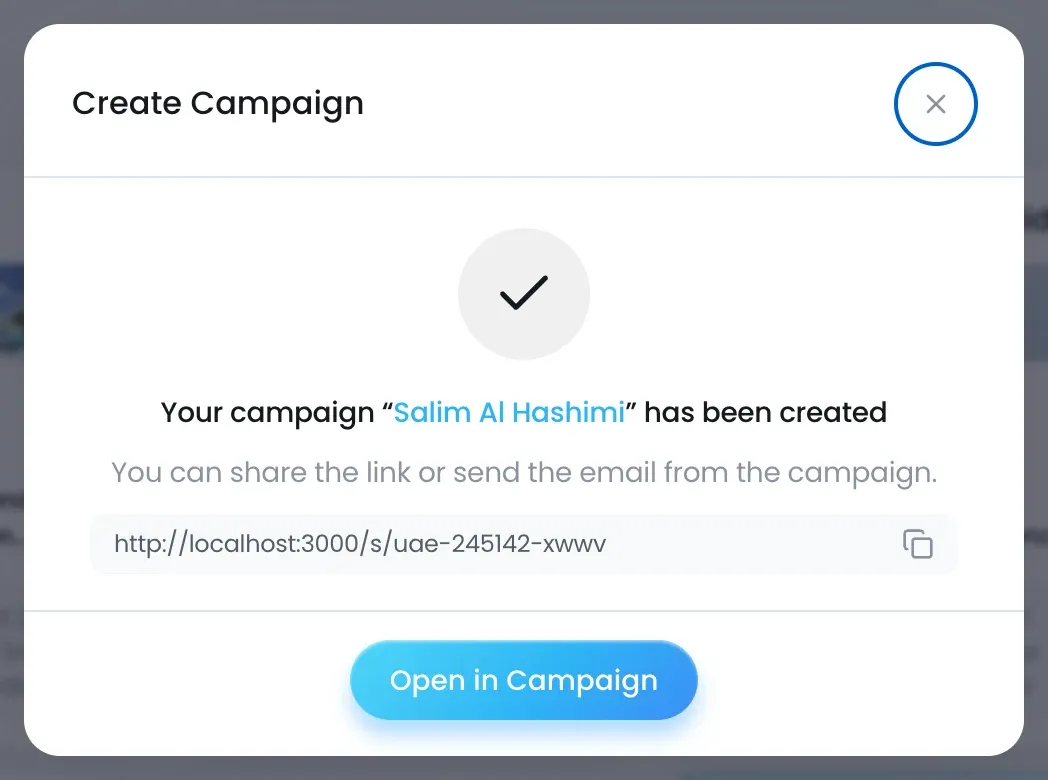
- In the Create Campaign confirmation, copy the link to paste into a message.
From a Manual Match folder
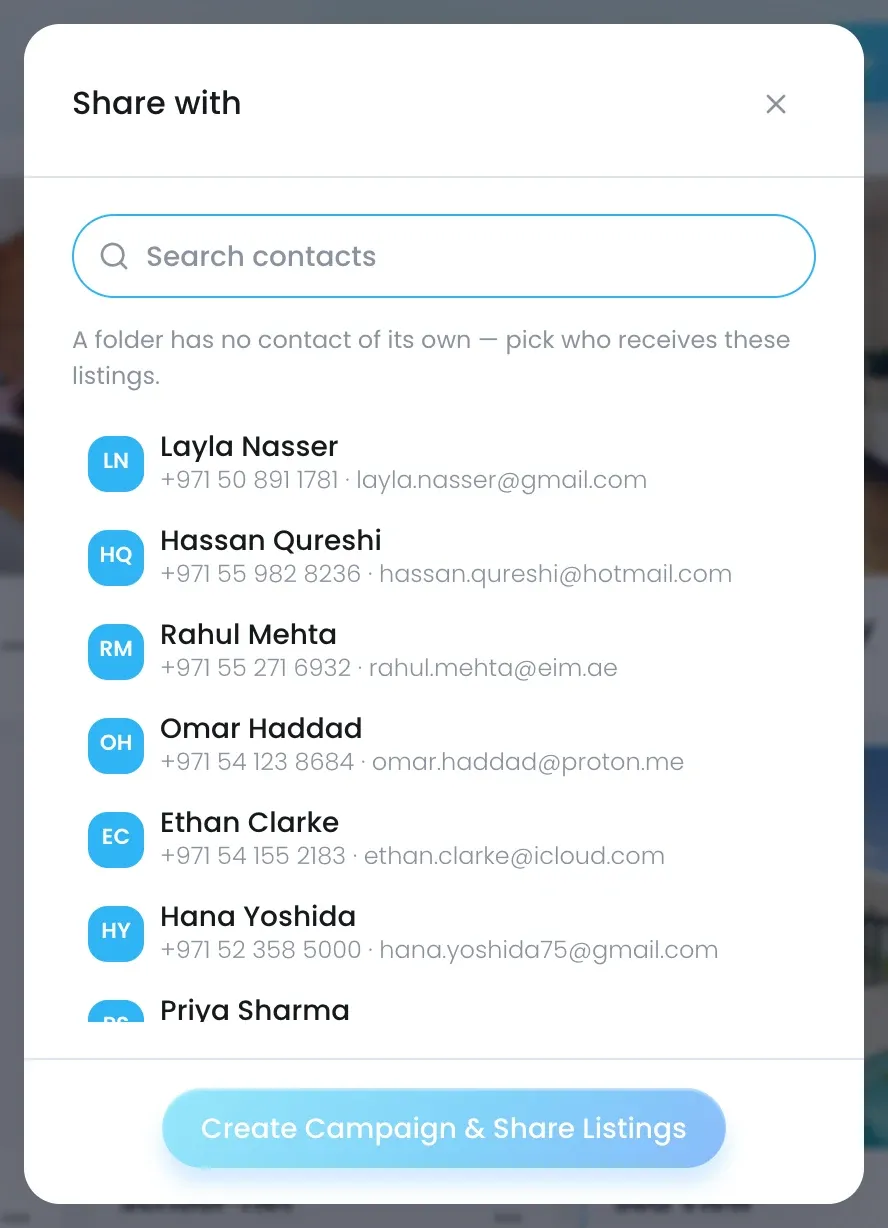
A folder has no contact of its own, so you pick who receives it.
- Open Listing Match and switch to Manual Match.
- Click the folder.
- Click Create Campaign & Share Listings.
- In Share with, search for the contact and click their name.
- Click Create Campaign & Share Listings.
The same confirmation appears, with the link.
From a contact
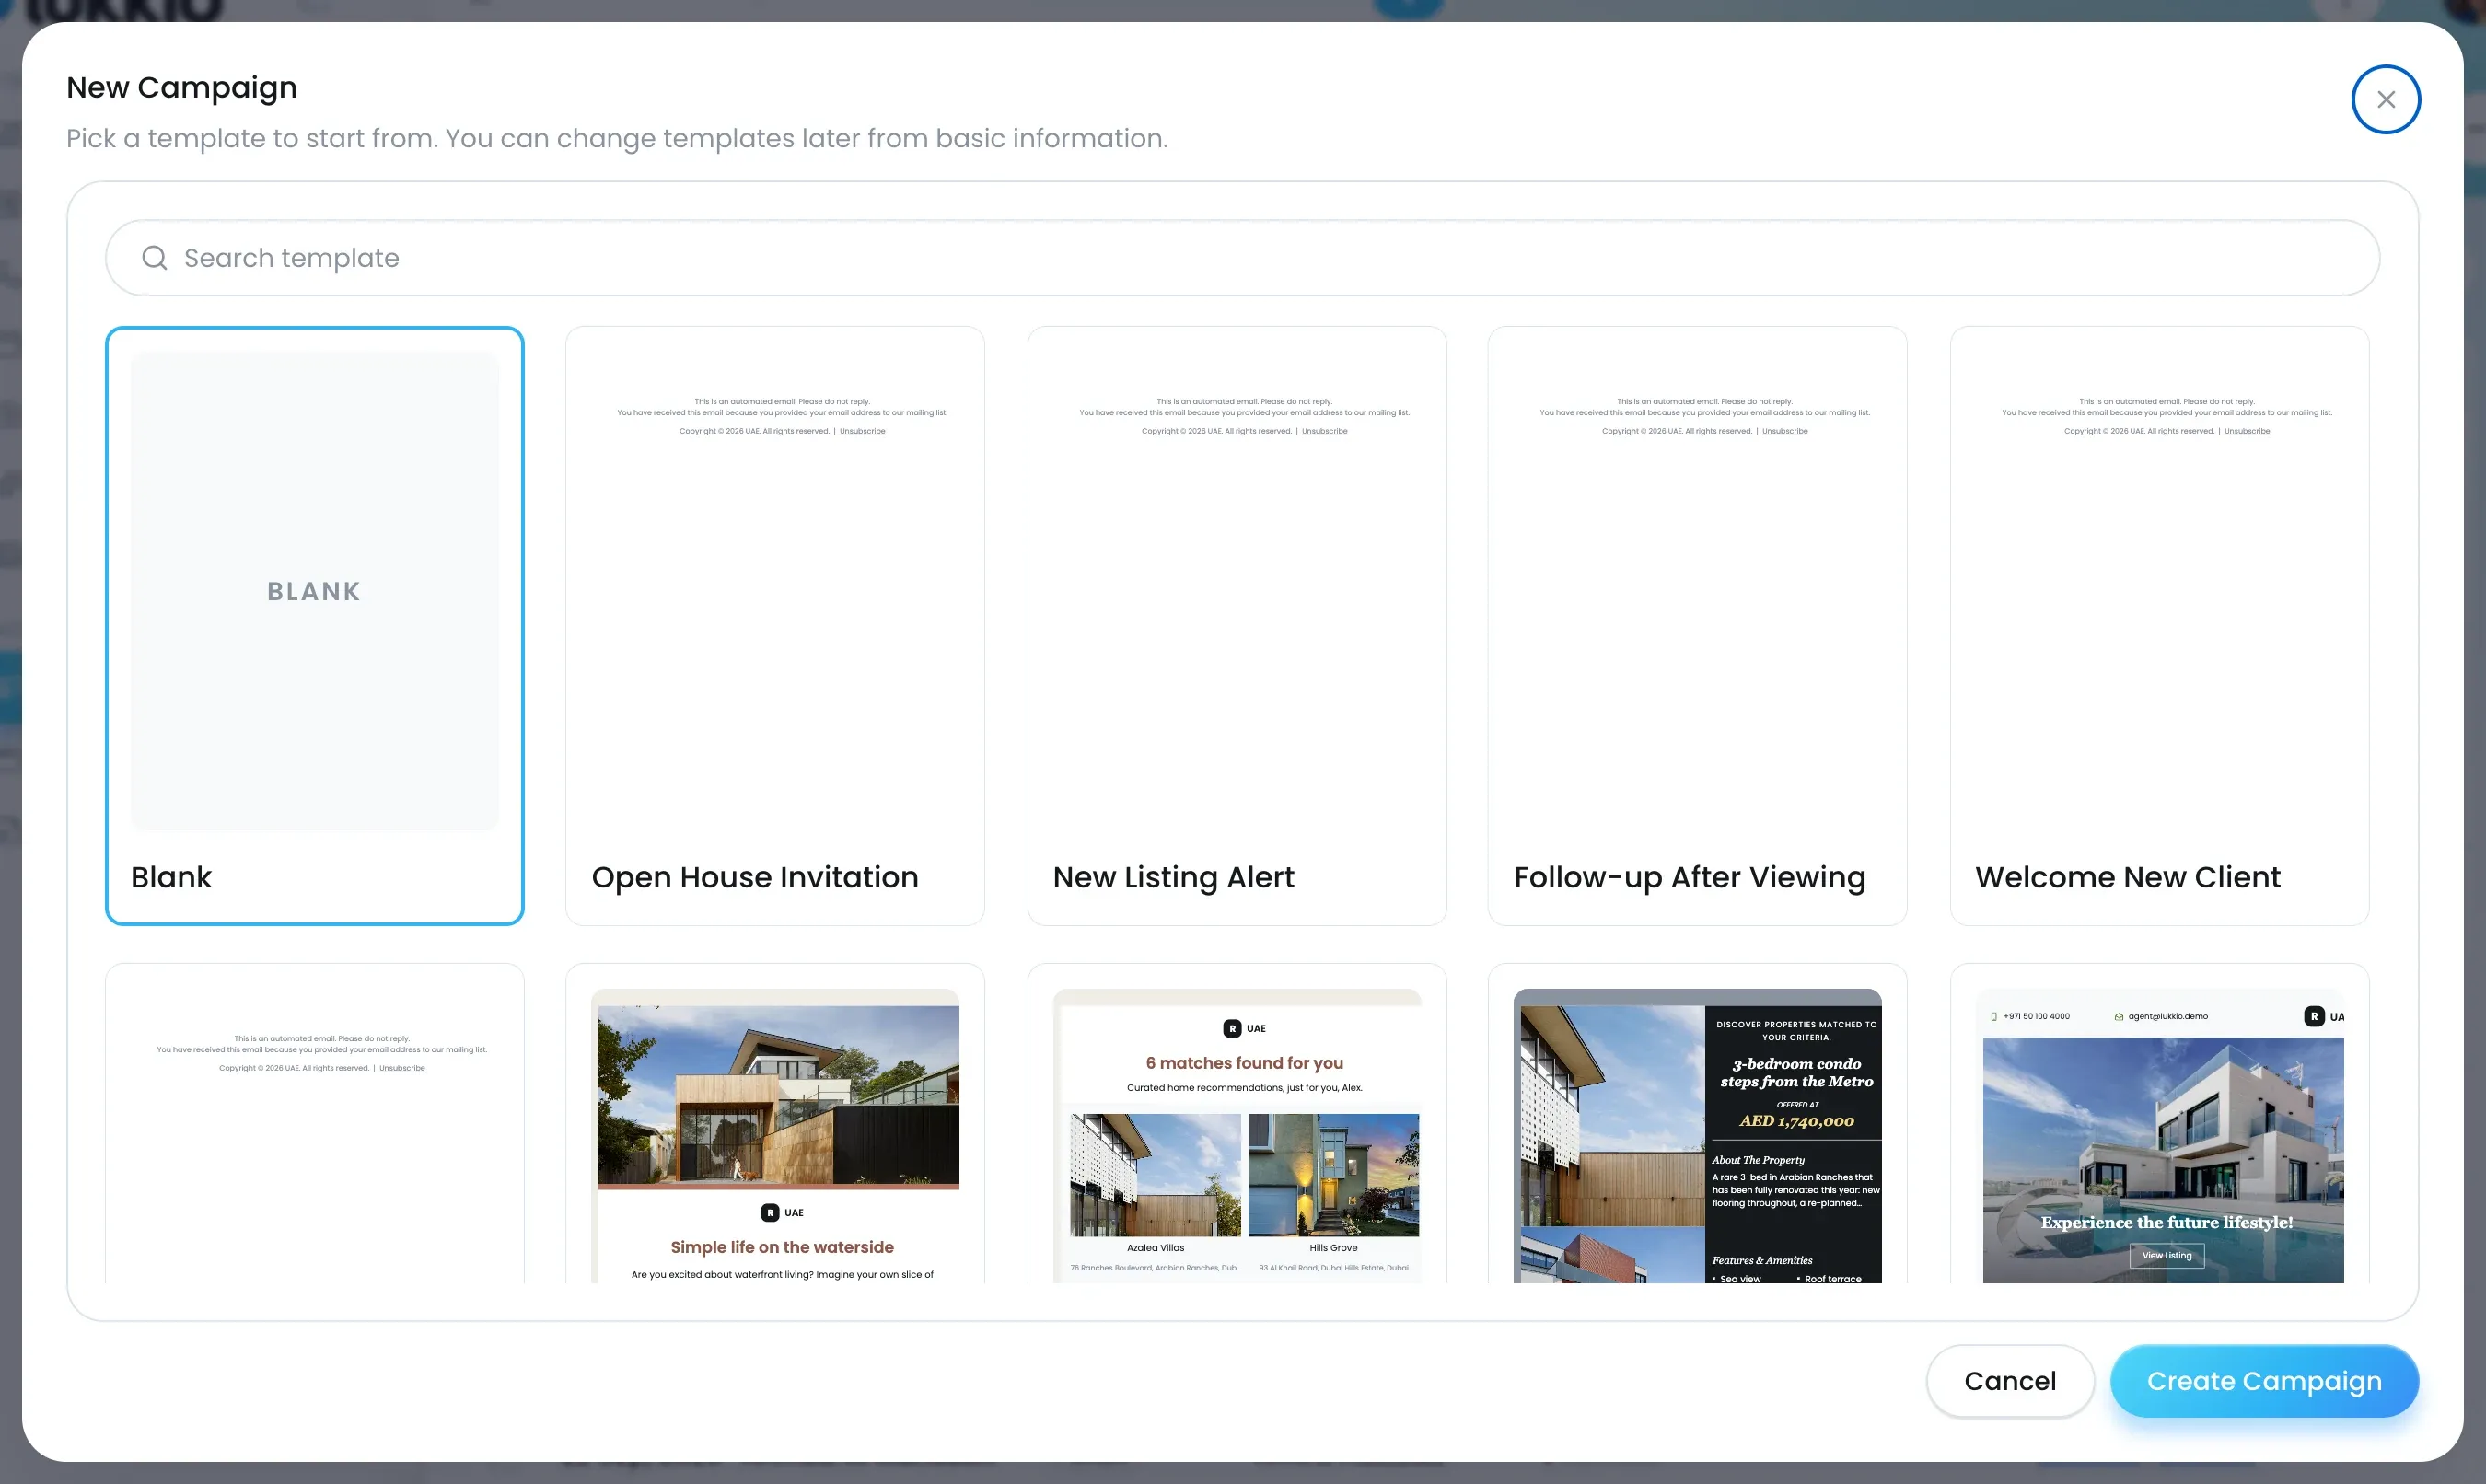
On a contact’s page, the Prospect Match section has an Add Campaign button. It opens New Campaign with the contact already set as the recipient; pick a template and click Create Campaign.
Send it
Connect your Gmail or Outlook account first, under Settings → Email Settings. Then open the campaign under Campaigns, check the subject and recipients under Basic Info, and click Send, or use Schedule on to pick a time. Send a campaign from a match shortlist walks through the editor.
Lists built by listing
A list under By Listings goes to several contacts at once. Recipients are the matched contacts you can open. A contact marked No-access is left out until the owner shares them with you.