A launch can mean 50 or 500 units. Instead of creating them one by one, the new property flow builds the unit table from a few numbers and creates a sale listing for every unit when you finish. Photos, floor plans and commission are set once and shared by all of them.
Before you start
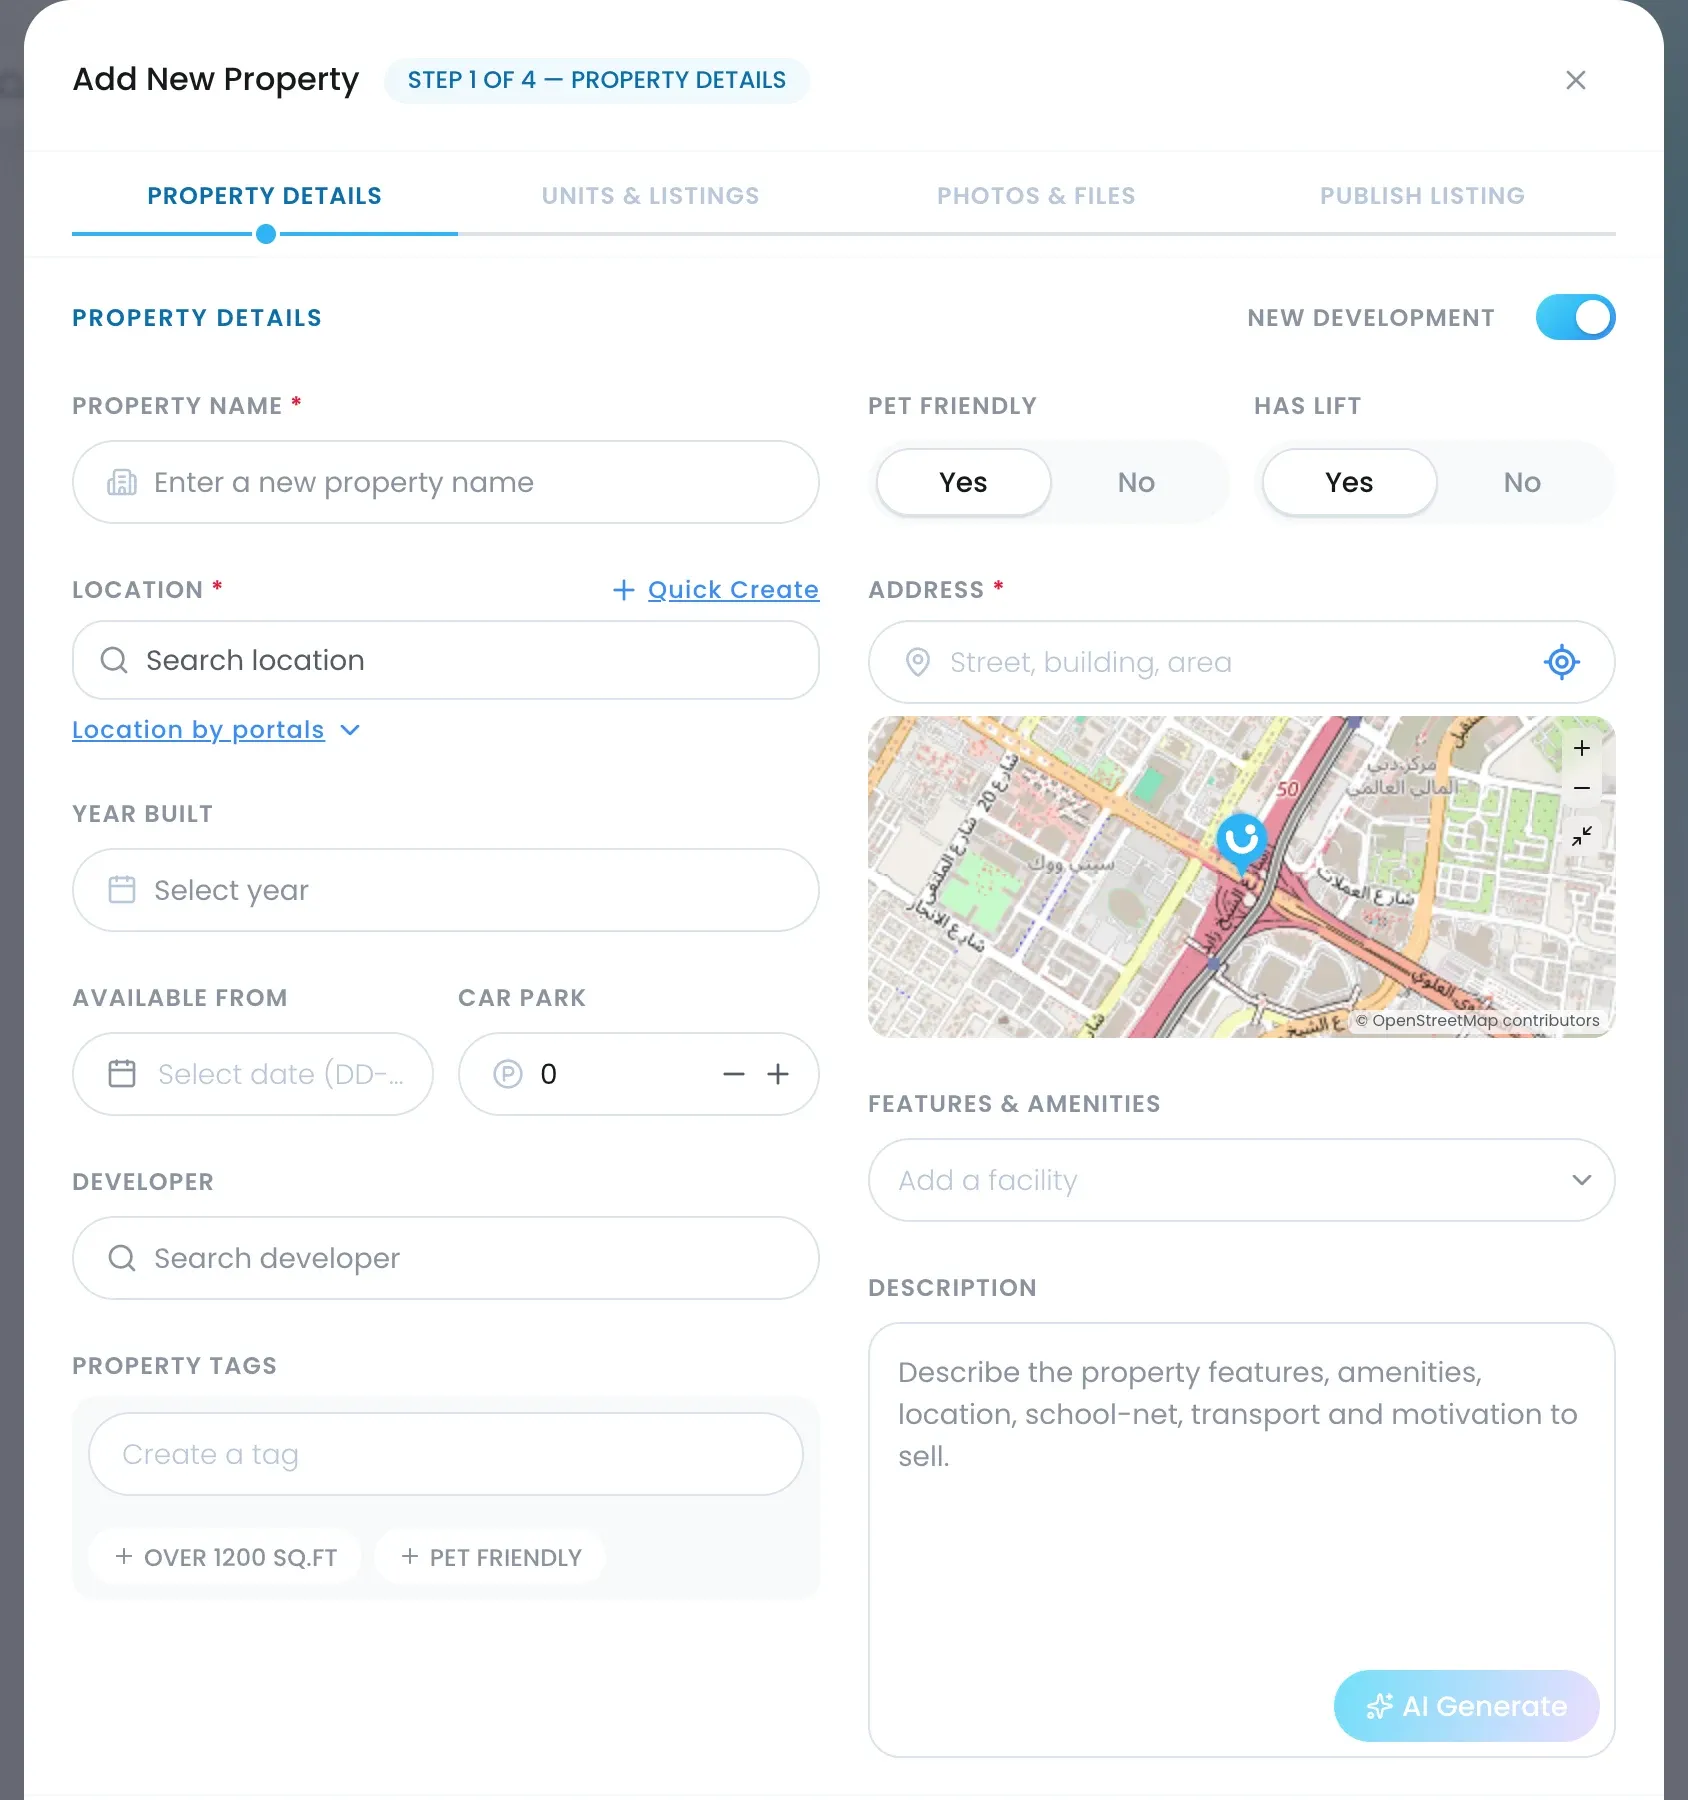
- The property name (it must be unique, up to 70 characters), its location down to the community, and its street address.
- How the project is laid out: number of towers or houses, floors per tower, units per floor, and how units are named (A, B, C or 01, 02).
- The launch photos, floor plan and payment plan from the developer, plus the commission rate and deposit.
Step 1: Property Details
- Open Properties and click Create Property.
- Leave New Development switched on.
- Enter the Property Name, pick the Location down to the community (the tree is your agency’s own list of locations) and type the Address.
- Fill in Year Built, Available From, Car Park, the Developer, Features & Amenities, Pet Friendly and Has Lift.
- Write the Description. Add Property Tags if your team uses them.
- Click Save & Next.
Step 2: Units & Listings
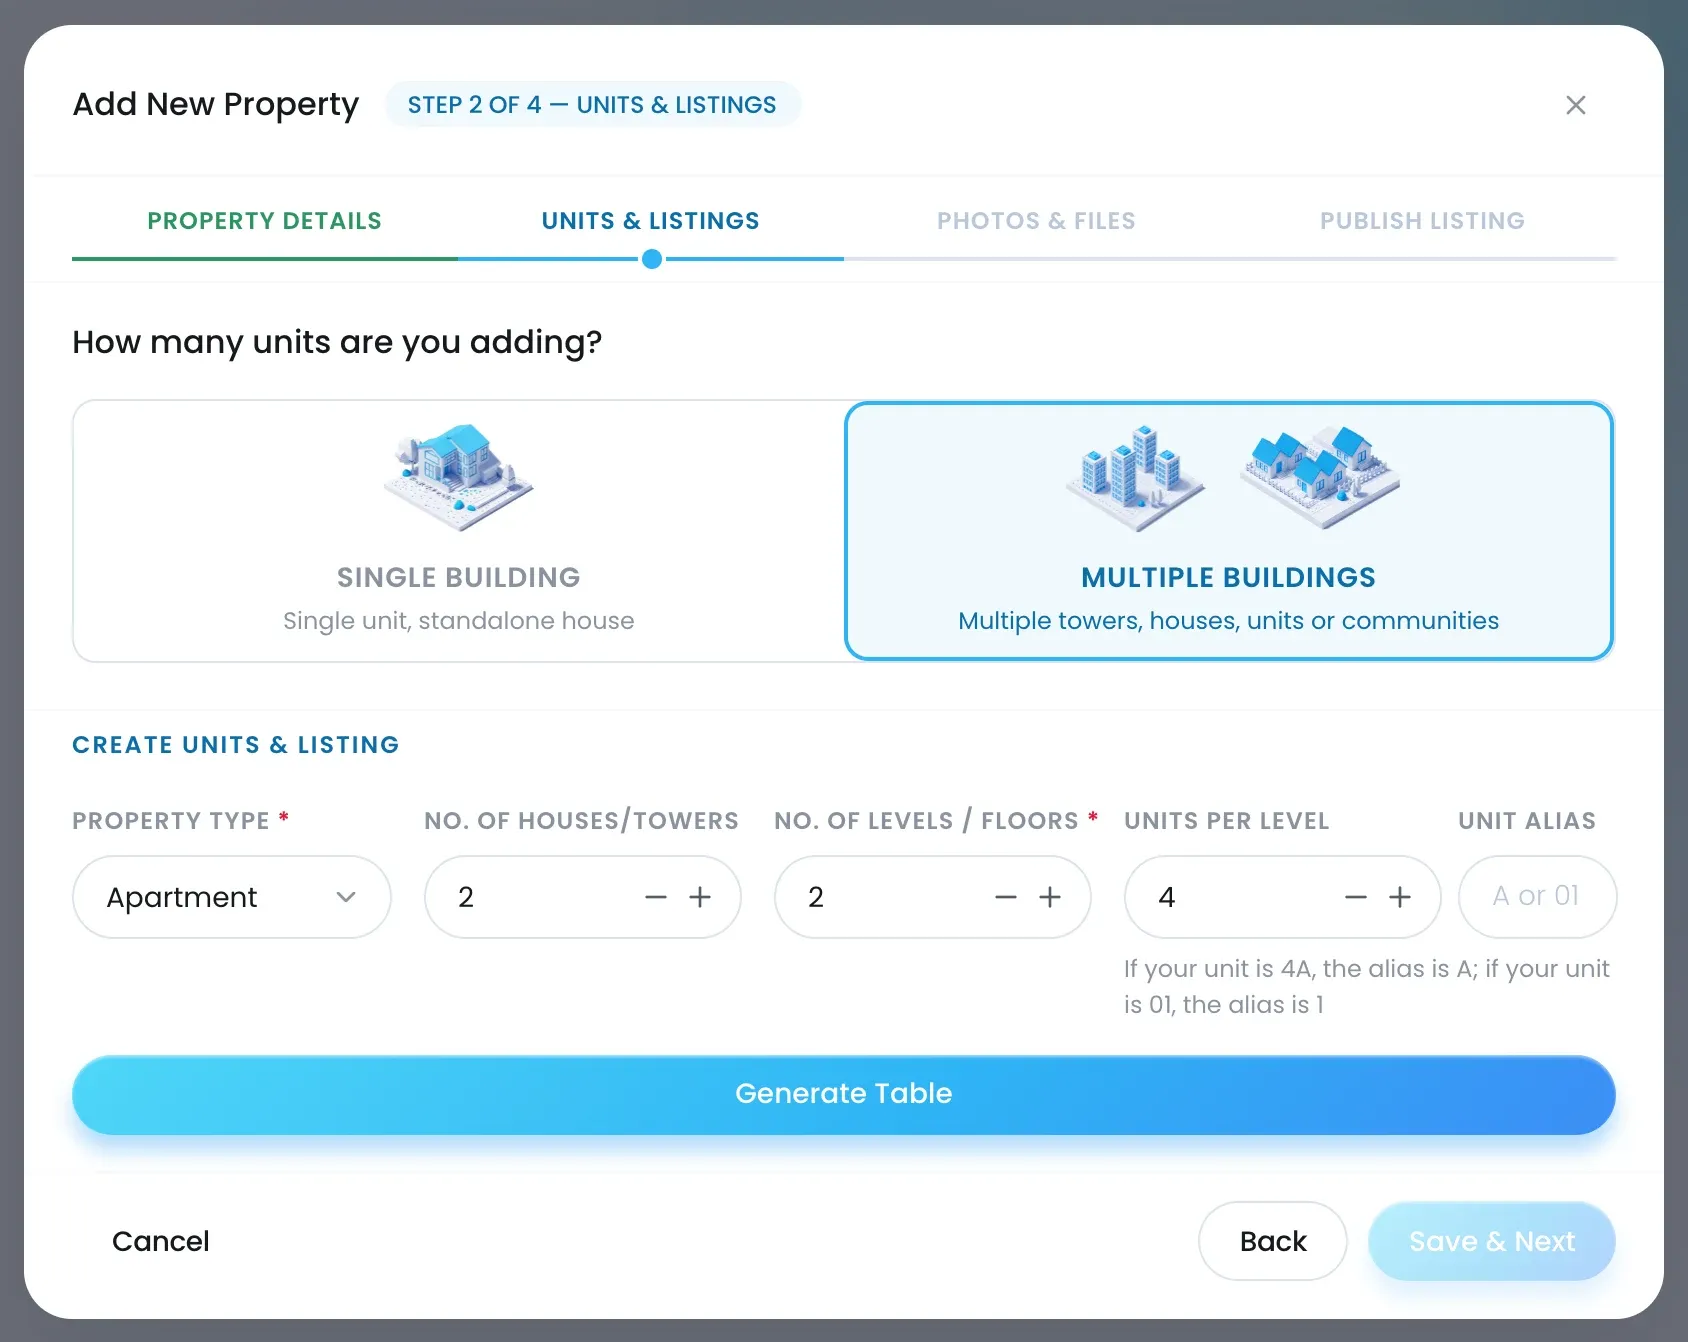
- Choose Single Building for one standalone building, or Multiple Buildings for towers, houses or a community.
- Pick the Property Type most units share, such as Apartment. You can change single rows afterwards.
- Set No. of Houses/Towers (multiple buildings only), No. of Levels / Floors, Units per Level and the Unit Alias: A if your units are 4A, 4B; 1 if they are 01, 02.
- Click Generate Table.
- Fill in each row: status, type, price, plot size, built-up area, view and room counts.
- To set the same value on many rows, tick them, fill in the Batch Edit bar and click Apply.
- Click Save & Next. Reset Table clears everything if you want to start again.
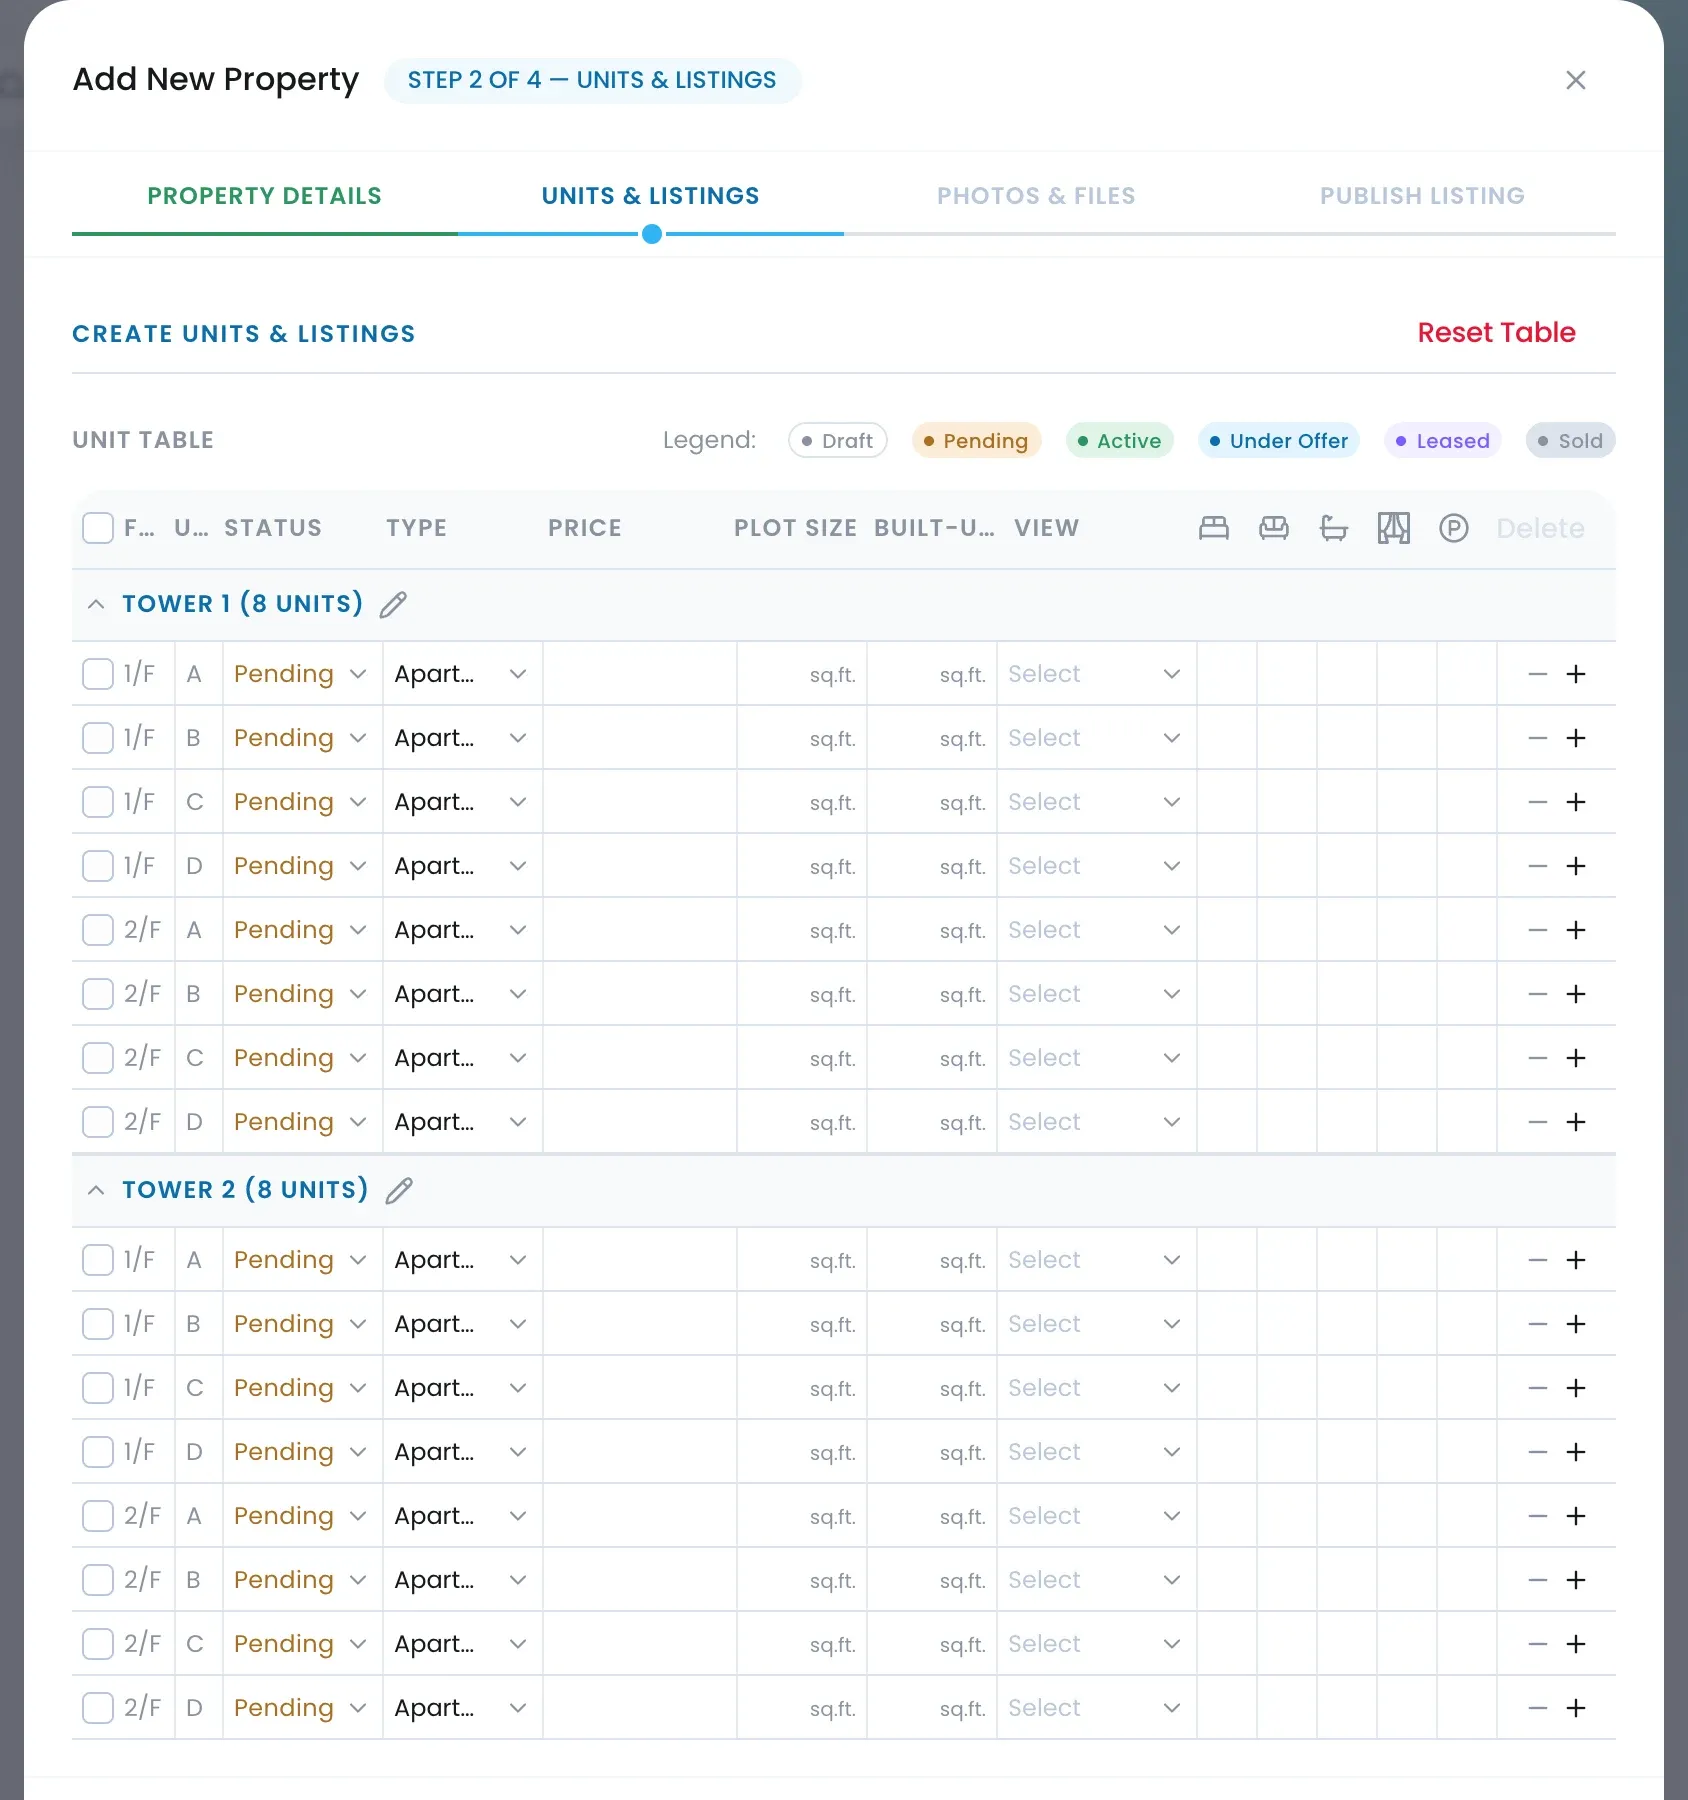
The table holds towers × floors × units per level rows, so two towers of two floors with four units each gives 16 units.
Step 3: Photos & Files
- Upload the Property Photos: up to 20, 2 MB each, JPG or PNG.
- Add the Floor Plan (up to 10 files, 5 MB per file) and Files such as the brochure and payment plan.
- Click Save & Next.
There’s no per-unit photo step in a launch. The units aren’t fitted out yet, so every listing uses the property photos.
Step 4: Commission & Distribution
- Choose the Commission Type (Percentage or Fixed Amount) and enter the Commission Rate and Deposit.
- Set the Agent Split so the primary and co-agent percentages add up to 100, and pick a Co-Agent if there is one.
- Click Save & Publish Listing.
Check what happened
- The property page opens with Total Units, Available and Reserved, and every unit in Unit & Listings, in Card or Table view.
- Every unit is now a listing on the Listings page. Open one to change its price, description or portals on its own.
- To change many at once, click Edit Unit Table in Unit & Listings (or Edit on the property, then Units & Listings), where the Batch Edit bar works on existing units too.