Most of the dropdowns your team sees are lists you control: the location picker, the property types, the amenities, the contact roles and sources. Set them once under Settings → Configurations and every form, filter and import uses them.
Before you start
- You are a Super Admin, or your role has the Config permission. Email Settings is the exception: everyone can open it.
- Have your area names ready. Locations is the list that takes longest.
Basic Settings
Settings → Basic Settings holds the workspace defaults: Country / Region, Currency, Unit of Measurement (sq ft or sq m) and Timezone, with a preview of how a price, an area and a date will look. The date format follows the country. Currency applies to every price, commission and deal value; the unit applies to every floor-area field. UAE agencies run in AED. Save your changes.
Locations
- Open Settings → Locations.
- Click + Location above Level - 1 and enter the emirate or region under Name of Location, for example Dubai.
- Select it. The Level - 2 column now belongs to it: click its + Location to add districts.
- Repeat down to Level - 4 for sub-communities and buildings.
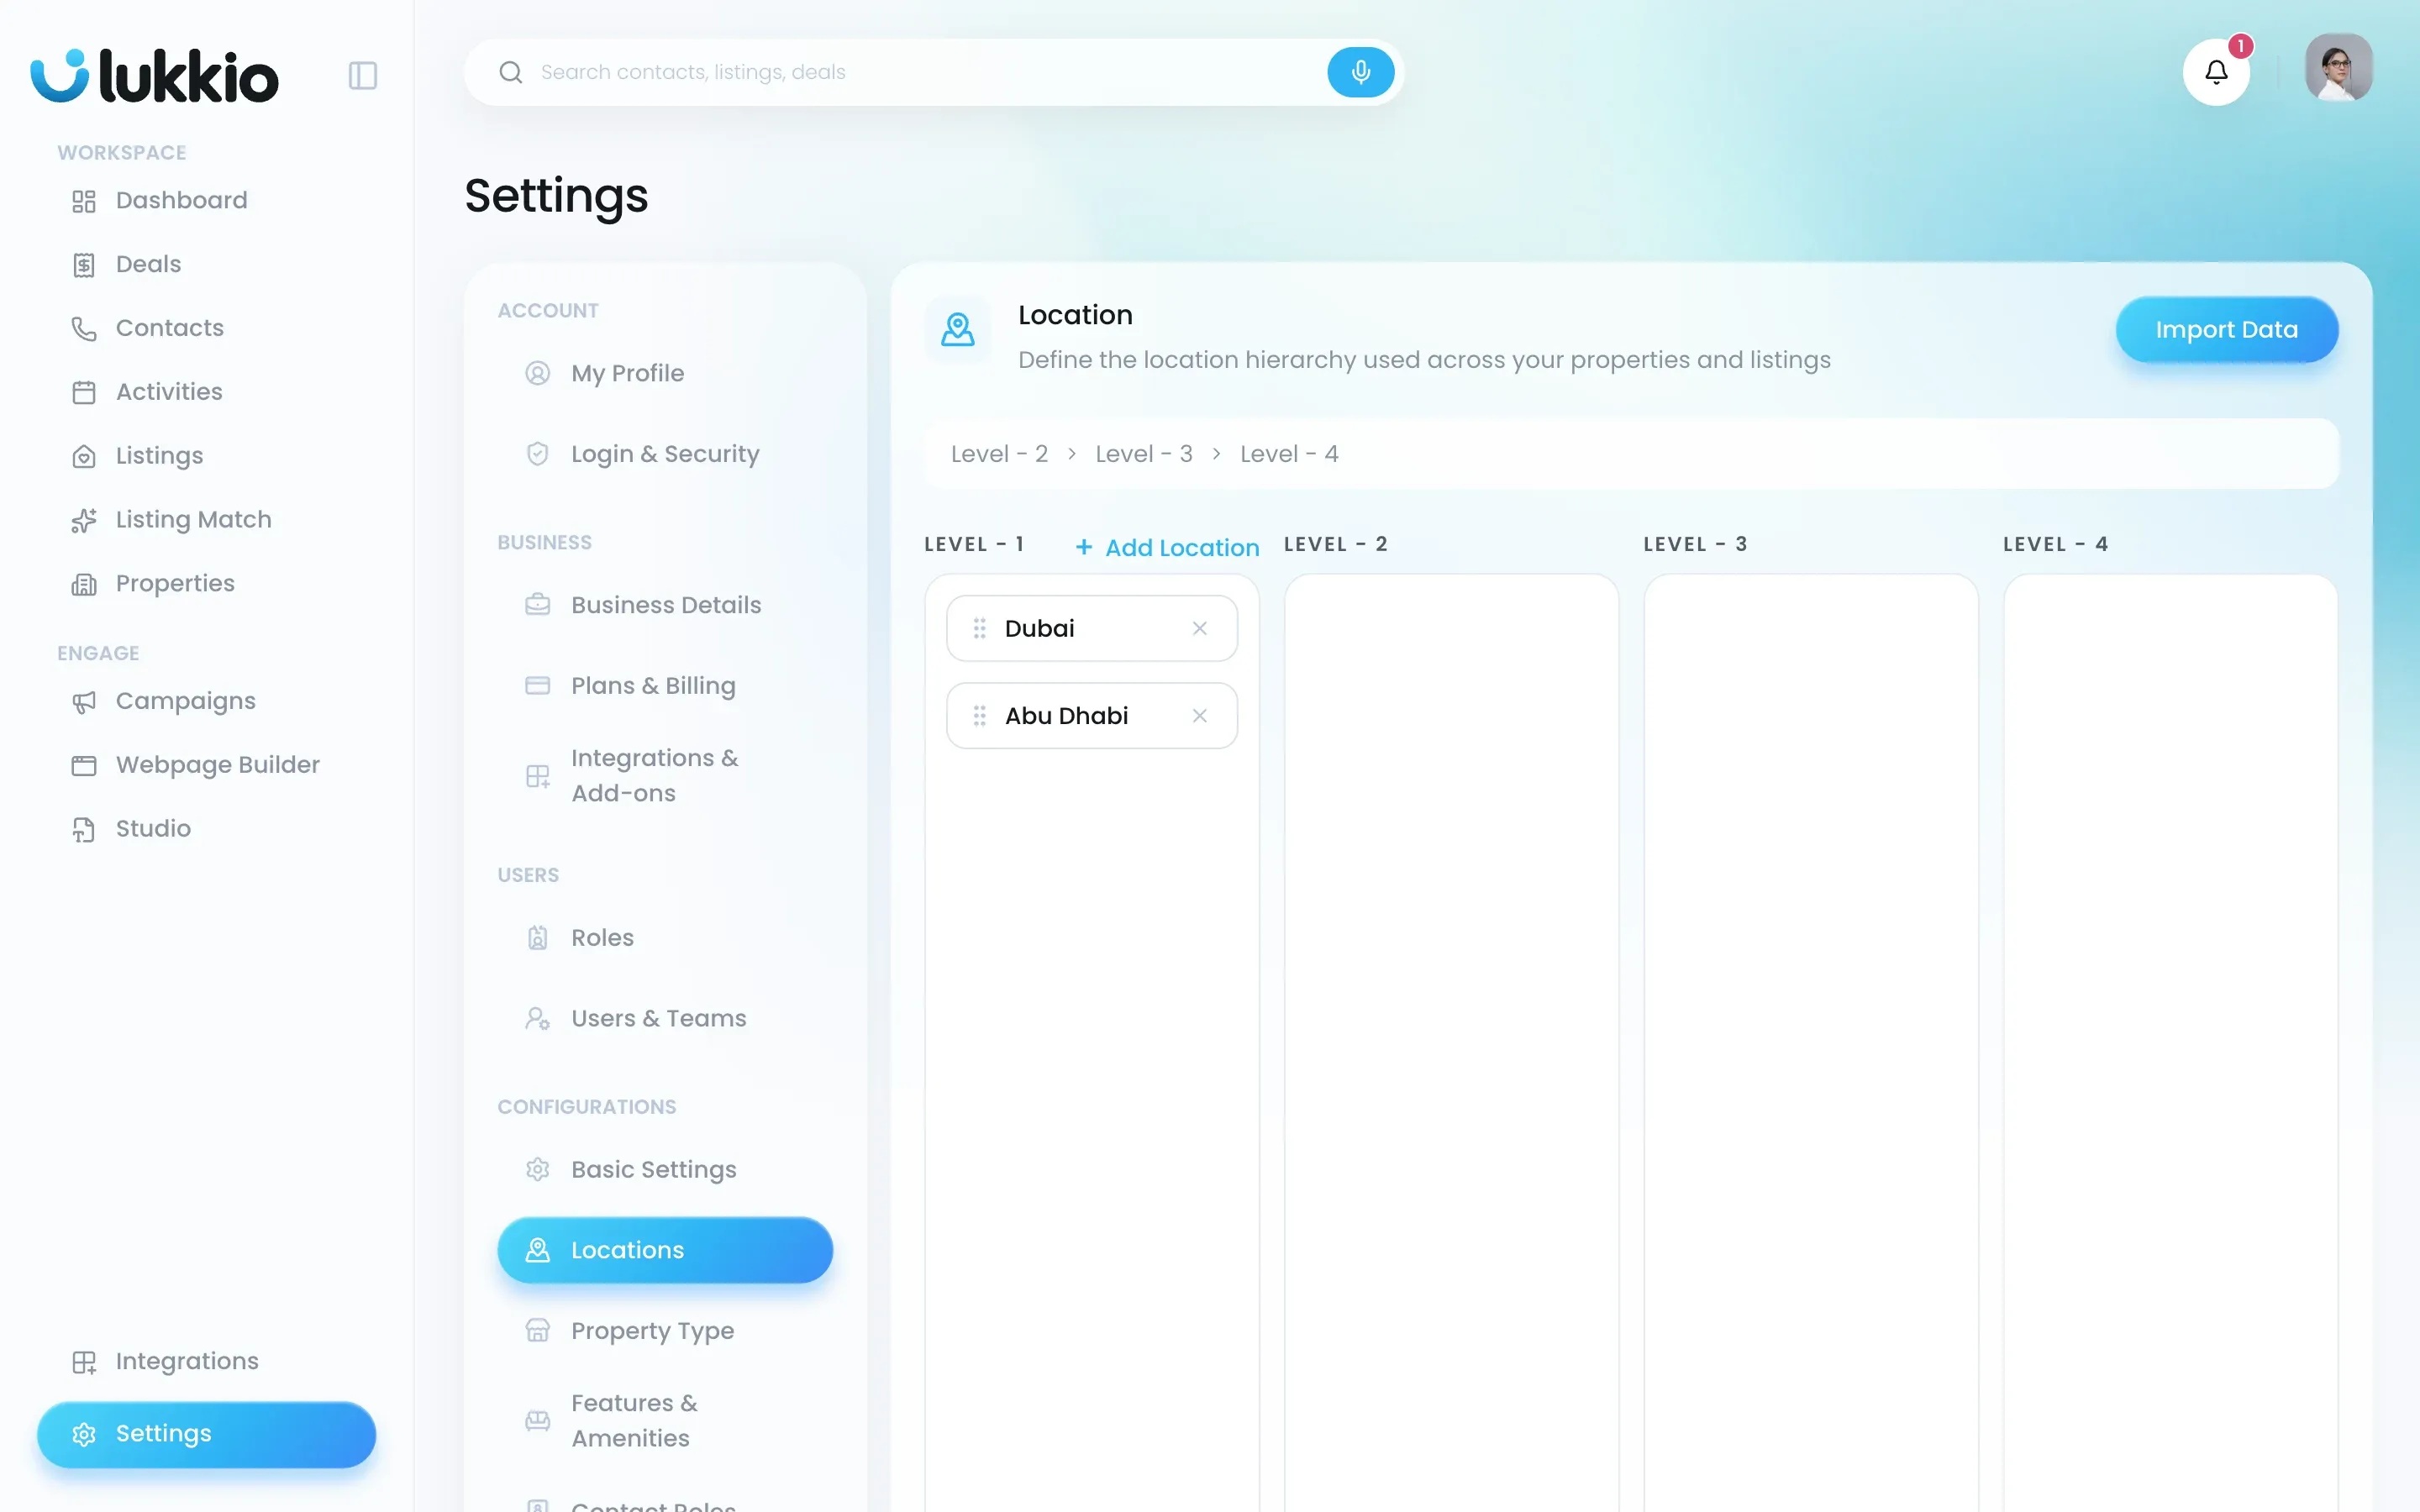
The × removes a location. To load the whole hierarchy at once, use Import Data and upload a CSV. The import only adds locations; it never renames or removes one.
Property types, amenities and contact sources
These three pages share one pattern.
- Tick an option in the system list on the left. It appears in the Selected Types, Selected Features & Amenities or Selected Items panel on the right.
- Drag items in the selected panel into the order you want them to appear in forms.
- Click Add Custom Type, + Custom Amenities or + Add Sources for anything the system list is missing.
- On Property Type and Contact Sources, Reset to Default returns to the system list and order.
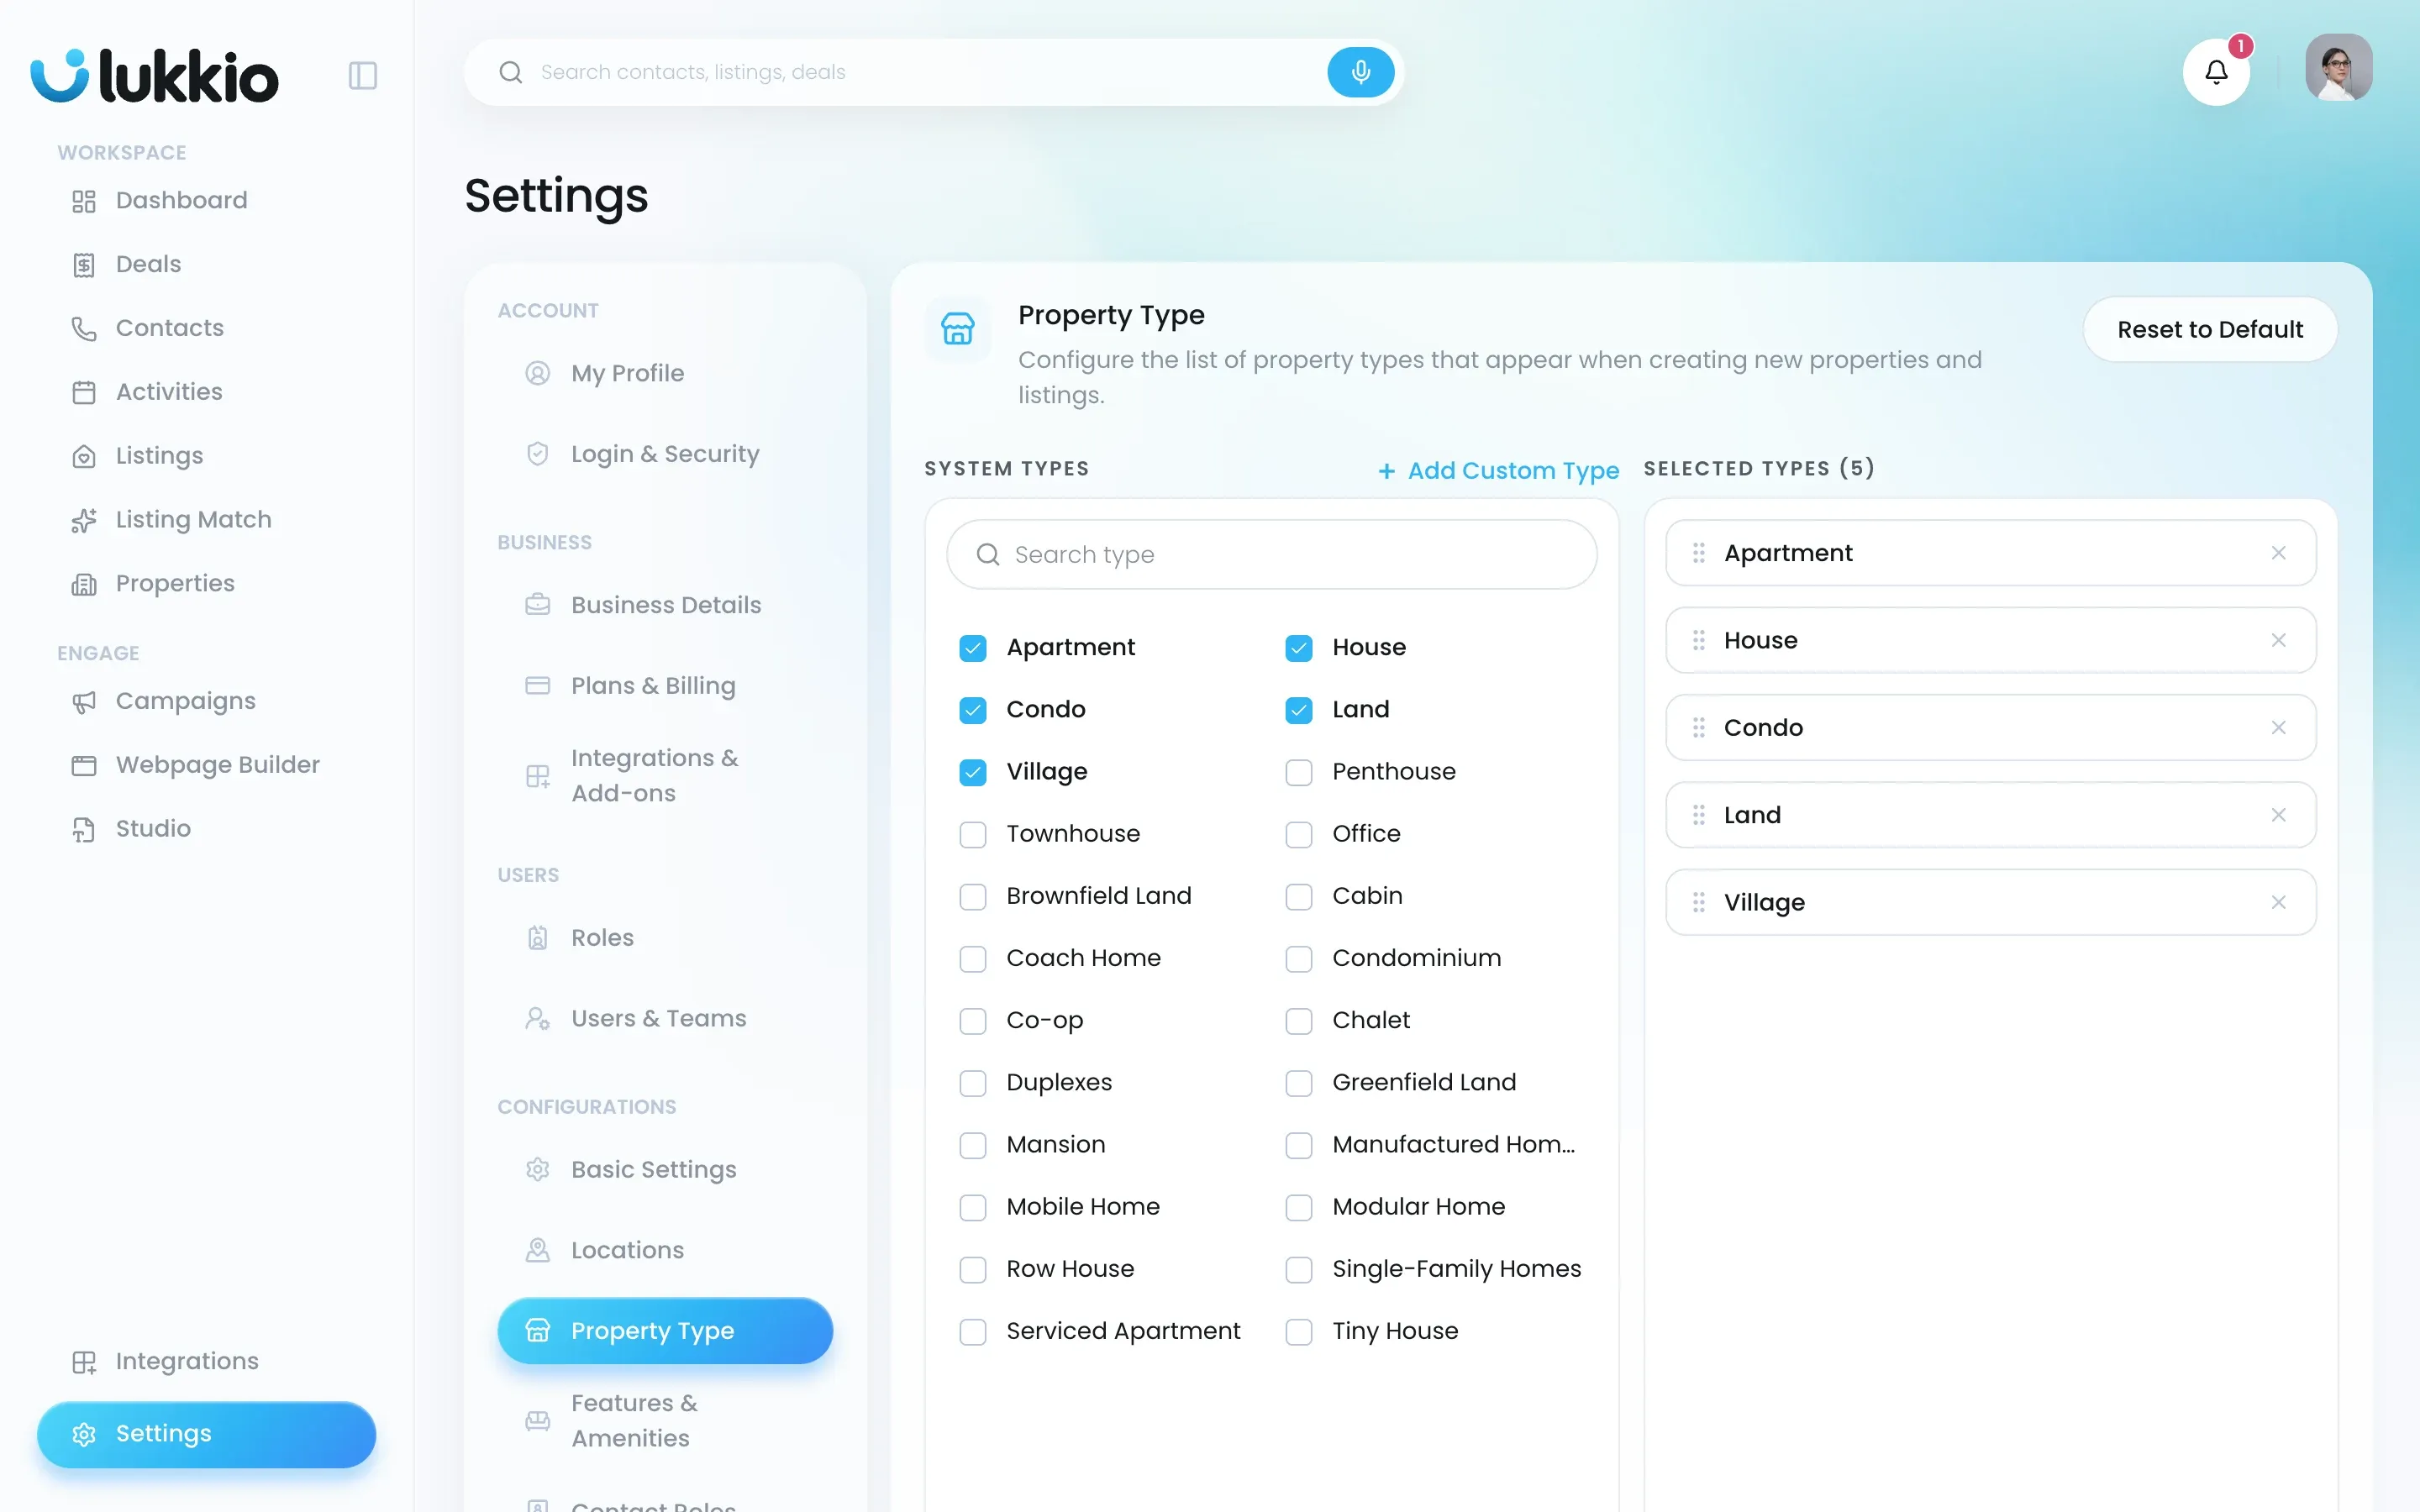
- Property Type: the list offered when creating properties and listings.
- Features & Amenities: switch between Listings and Property in the top right.
- Contact Sources: where a contact came from. The system list includes sources such as Referral, Walk-in, PropertyFinder, Bayut and Agency Website.
System options cannot be deleted, only unticked. Custom ones have a ×.
Contact Roles
Settings → Contact Roles works a little differently. Buyer, Tenant, Landlord and Developer are built in and cannot be removed. Developer has no built-in profile, only the custom fields you add here; custom roles can be removed with the ×, and Add Custom Contact Roles adds one. Select a role and the right-hand panel shows the sections of custom fields captured for that role, such as an ID number for buyers: Add a section creates a group of fields. Reset to Default restores the system roles.
Email Settings
Settings → Email Settings is where you connect your Gmail or Outlook account, so campaigns and emails send from your own address. The connected mailbox shows under Email Account.
AI Writing Style
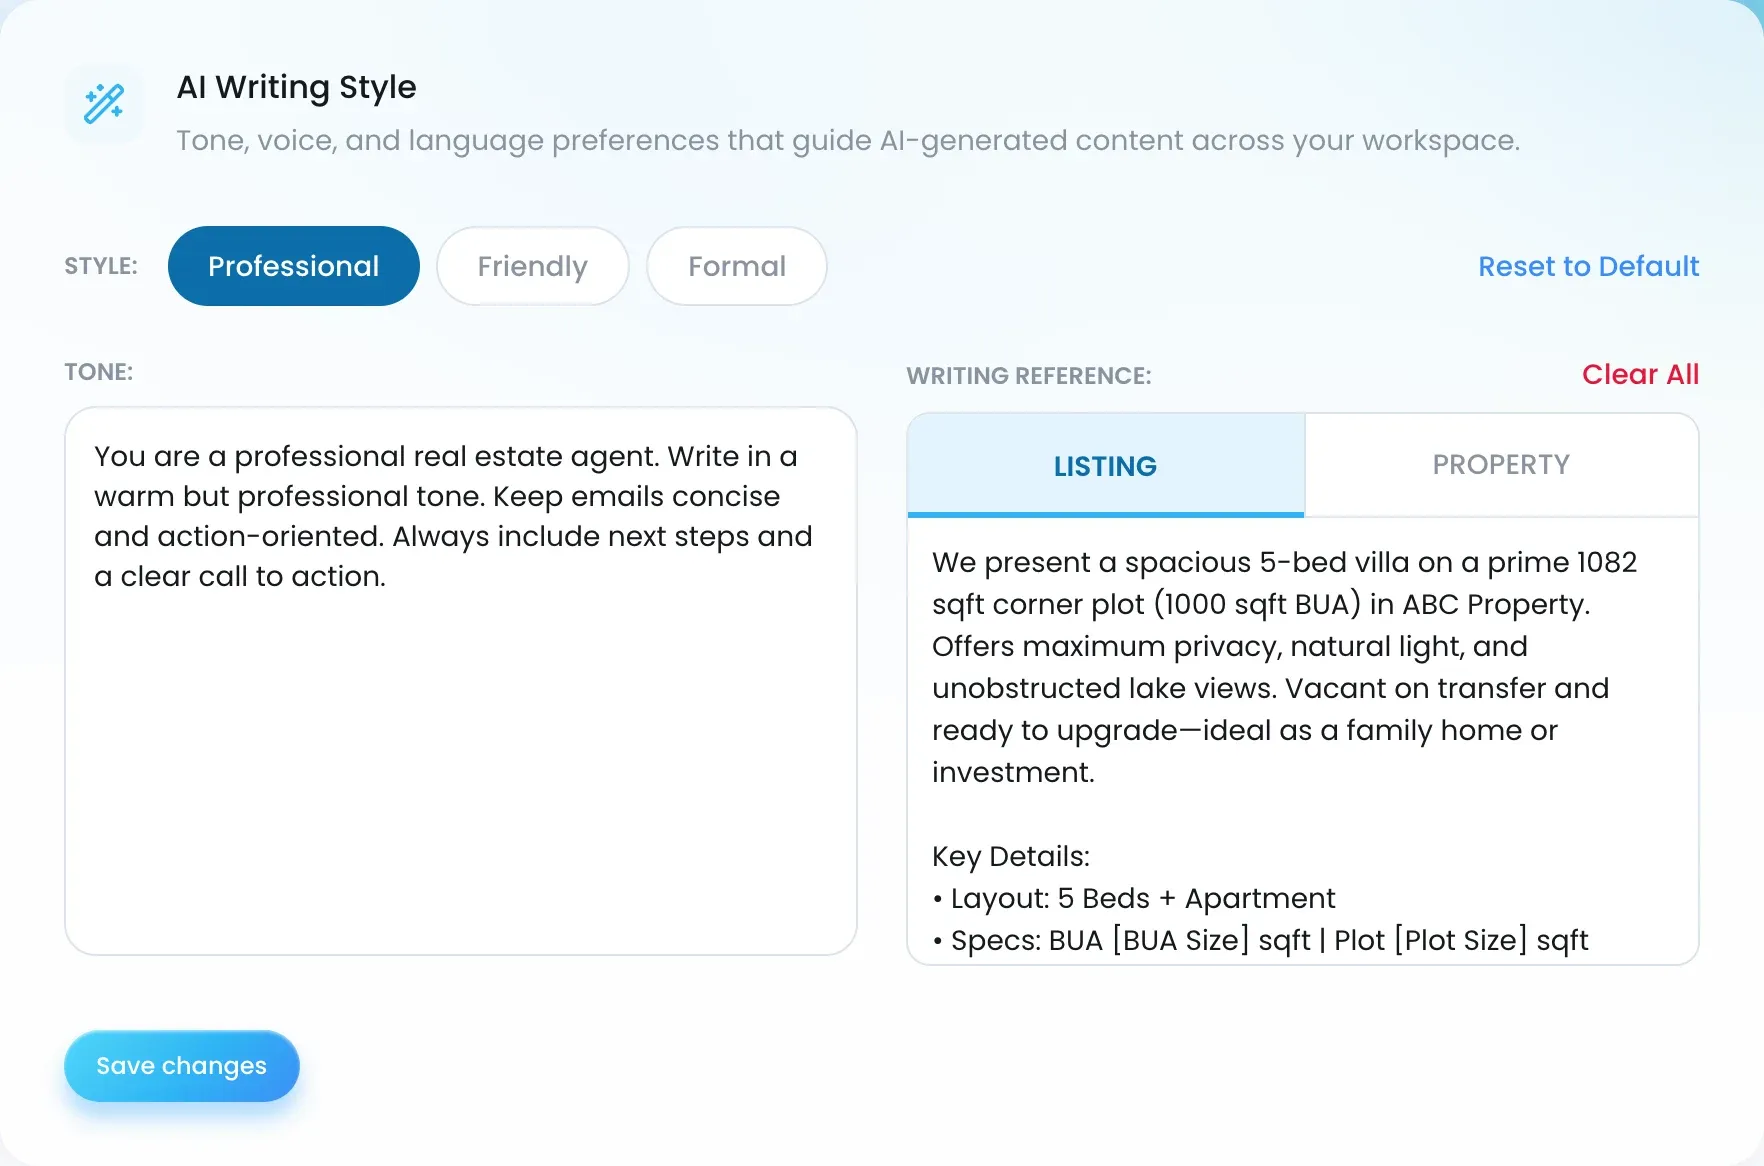
Lukkio writes listing descriptions and emails in the style you set under Settings → Basic Settings → AI Writing Style.
- Pick a Style: chip: Professional, Friendly or Formal. The Tone: box fills with that preset.
- Edit the Tone: text if you want to say more about how Lukkio should write.
- Save your changes.