
Every person in your agency gets their own login, a role that says what they can do, and usually a team. Set these up once and the dashboard, the contact lists and the deal pipeline scope themselves for each person automatically.
Before you start
- You’re a Super Admin, or your role has the User permission. Only they can open Users & Teams.
- You have a free seat. The Seats Used card shows how many are left, and Add Seats takes you to billing. See Choose and manage your seats.
- If you want teams, know who leads each one. A team needs a lead.
Add a user
- Open Settings, then Users & Teams.
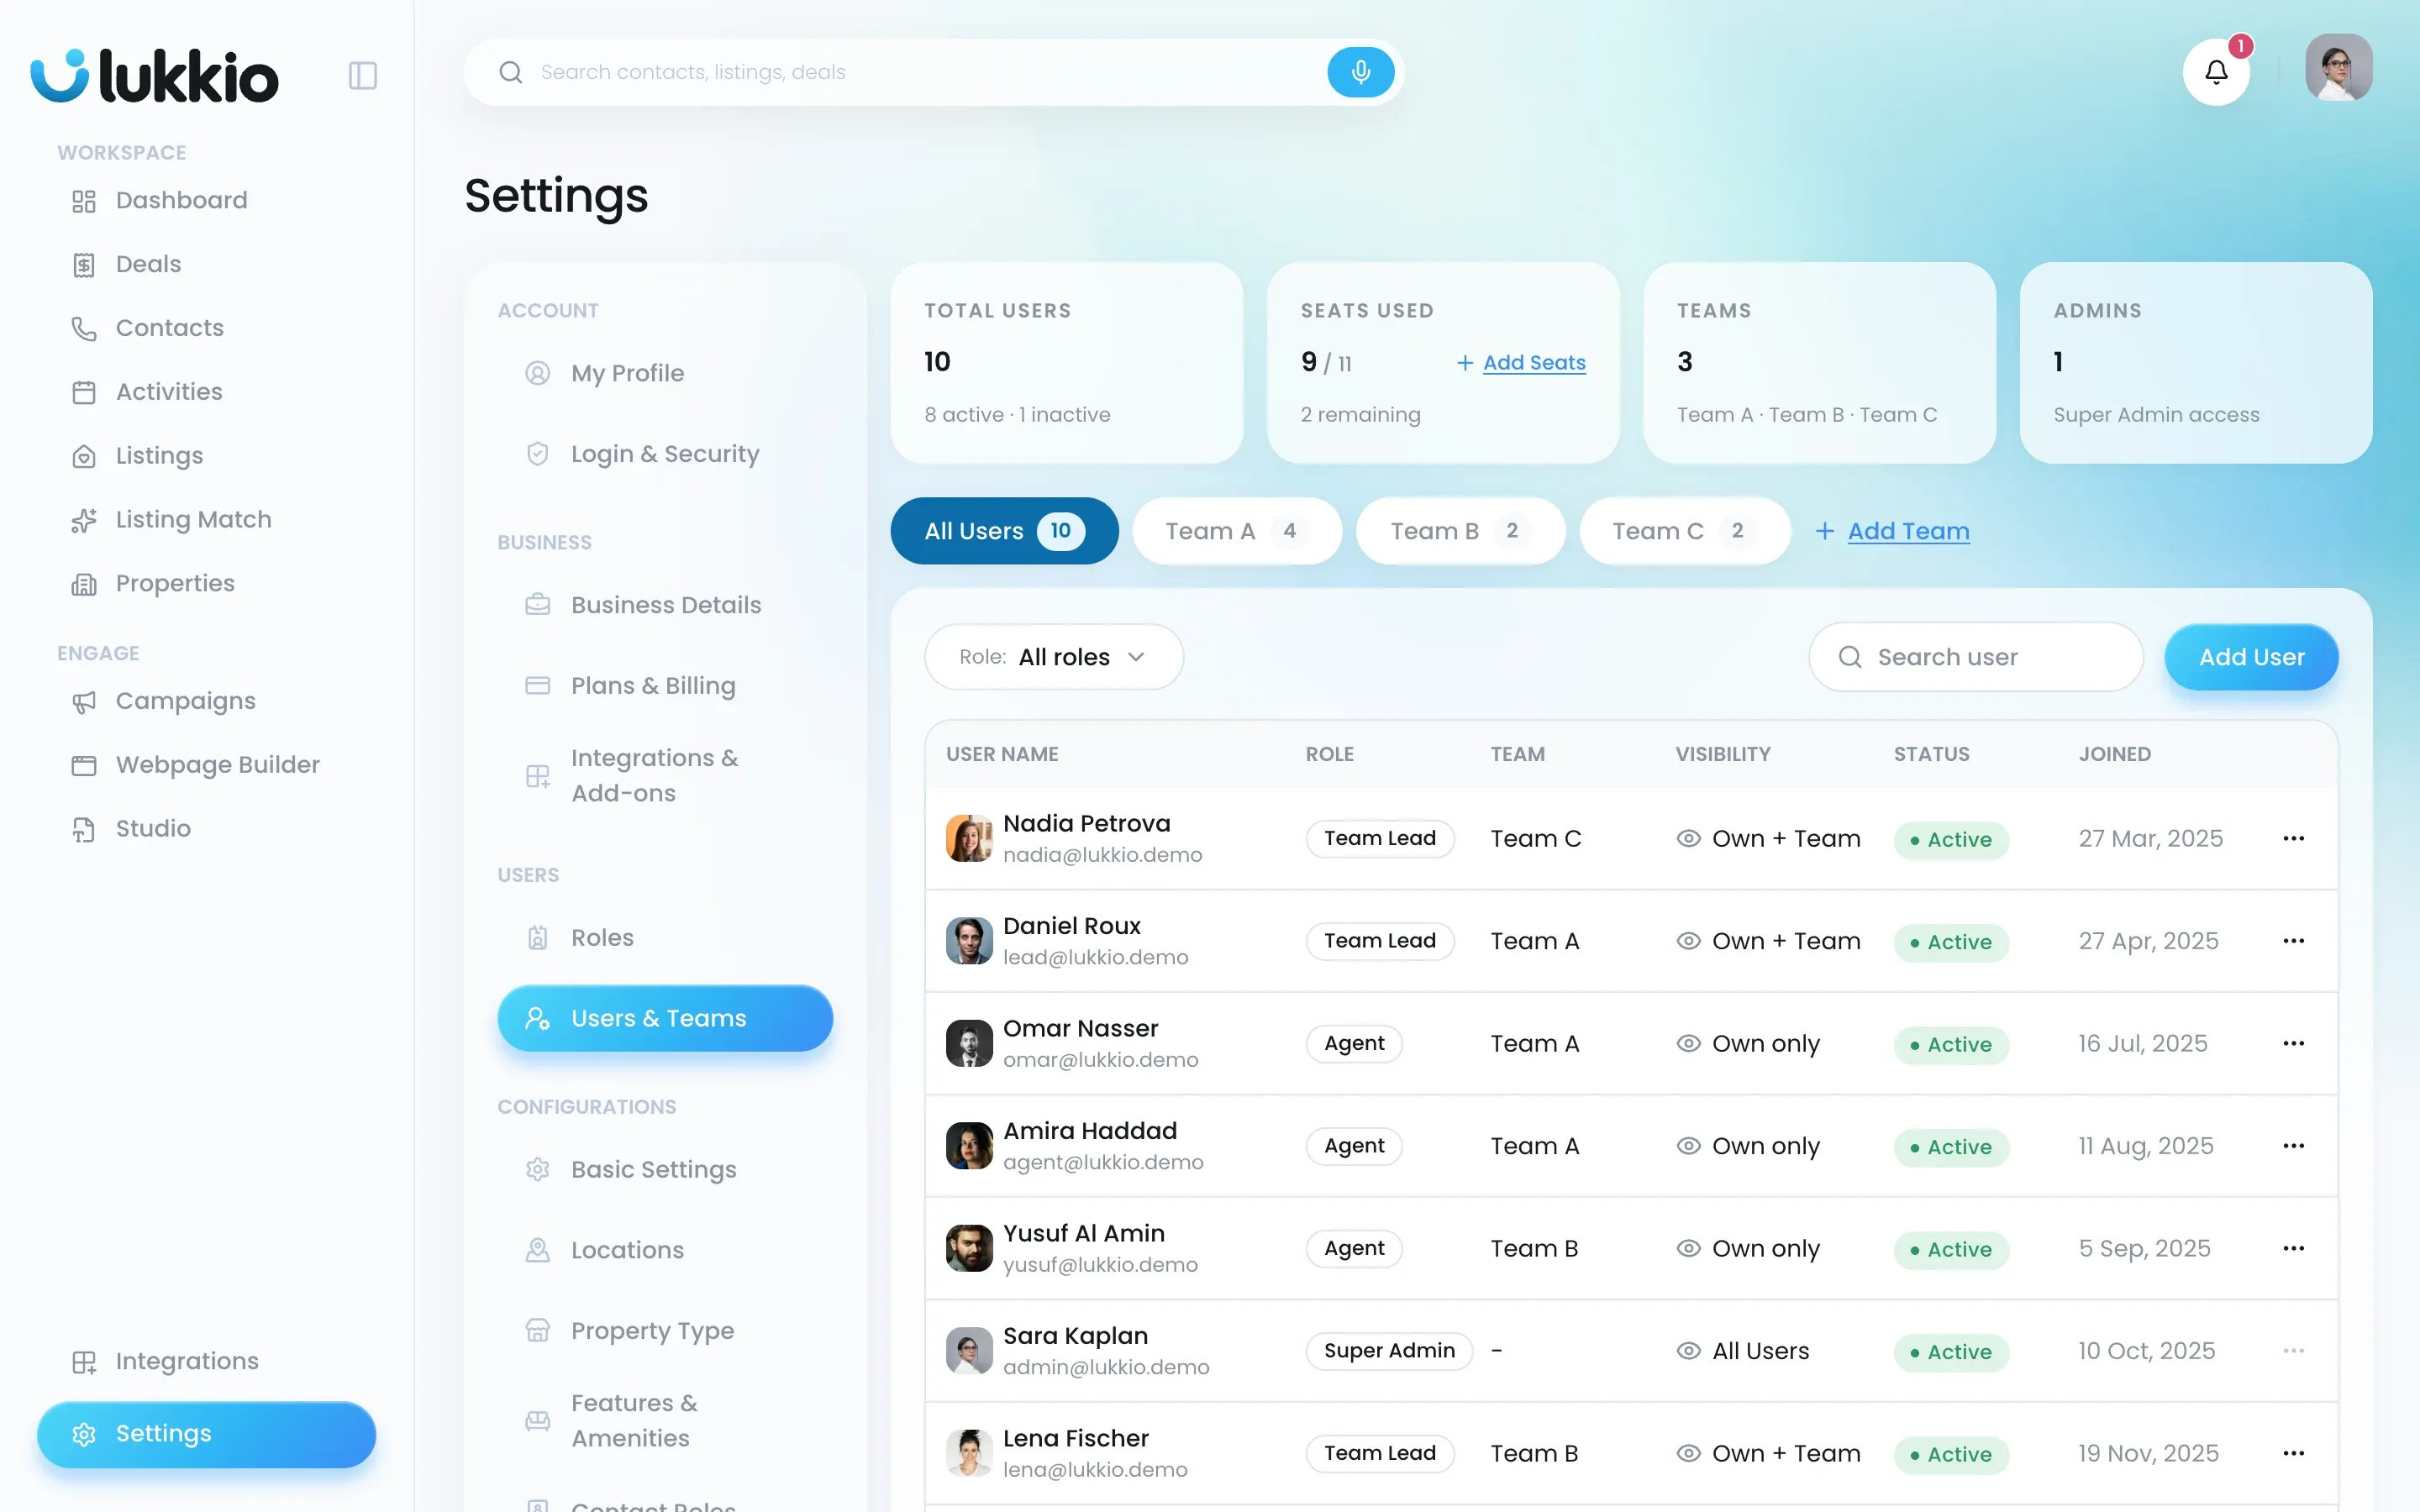
- Click Add User.
- Enter the person’s Email, a Password and the same again in Confirm Password.
- Enter their First Name and Last Name.
- Choose a Role. The label next to it shows the data visibility that role brings.
- Optionally pick a team under Assign to Team.
- Click Save.
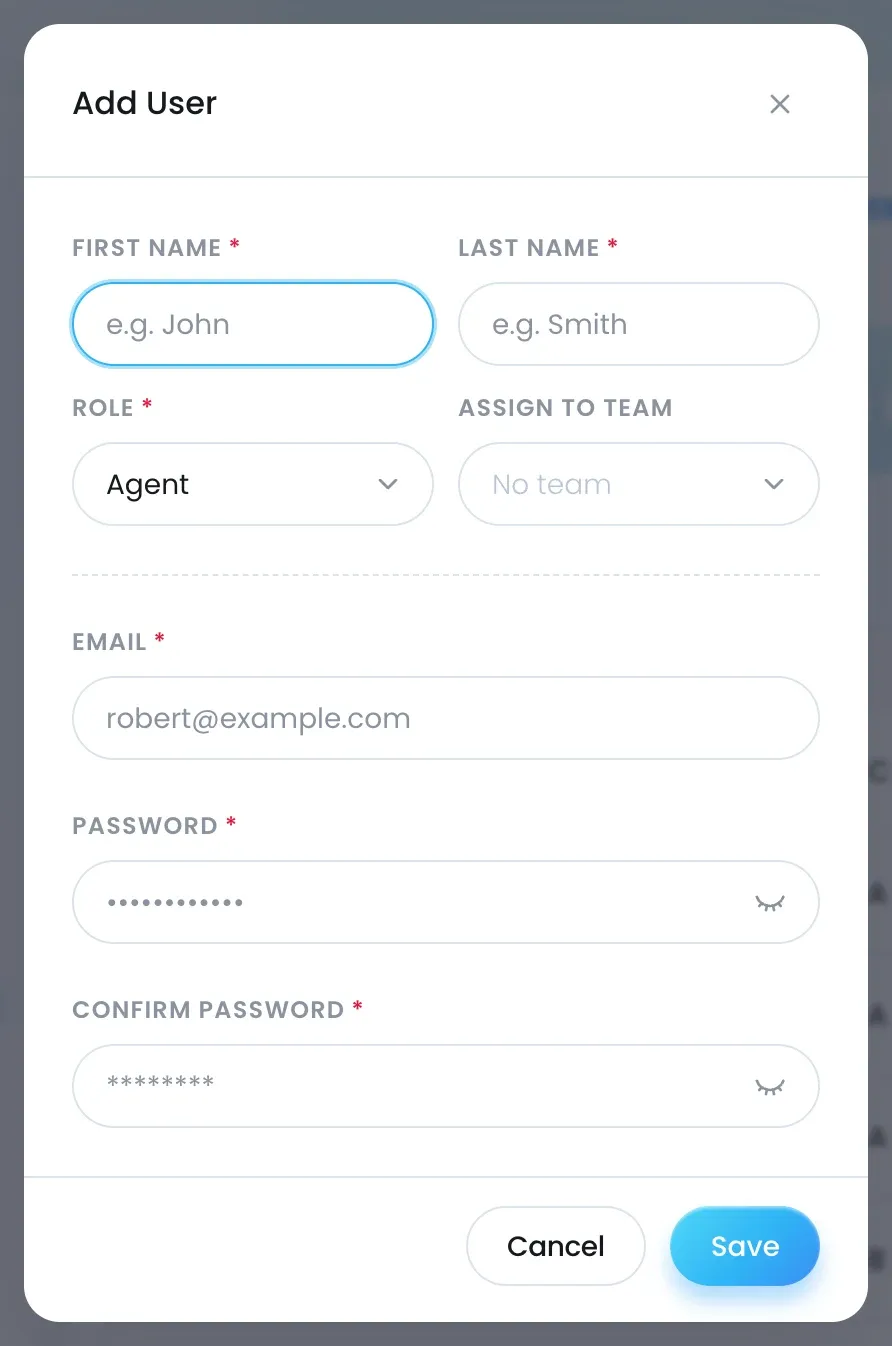
The person can sign in straight away with that email and password, and takes one of your free seats.
Create a team
- In Users & Teams, click + Add Team at the end of the tab row.
- Enter a Team Name.
- Choose the Team Lead.
- Add Team Members from the list of existing users.
- Add a Description if it helps, then click Create Team.
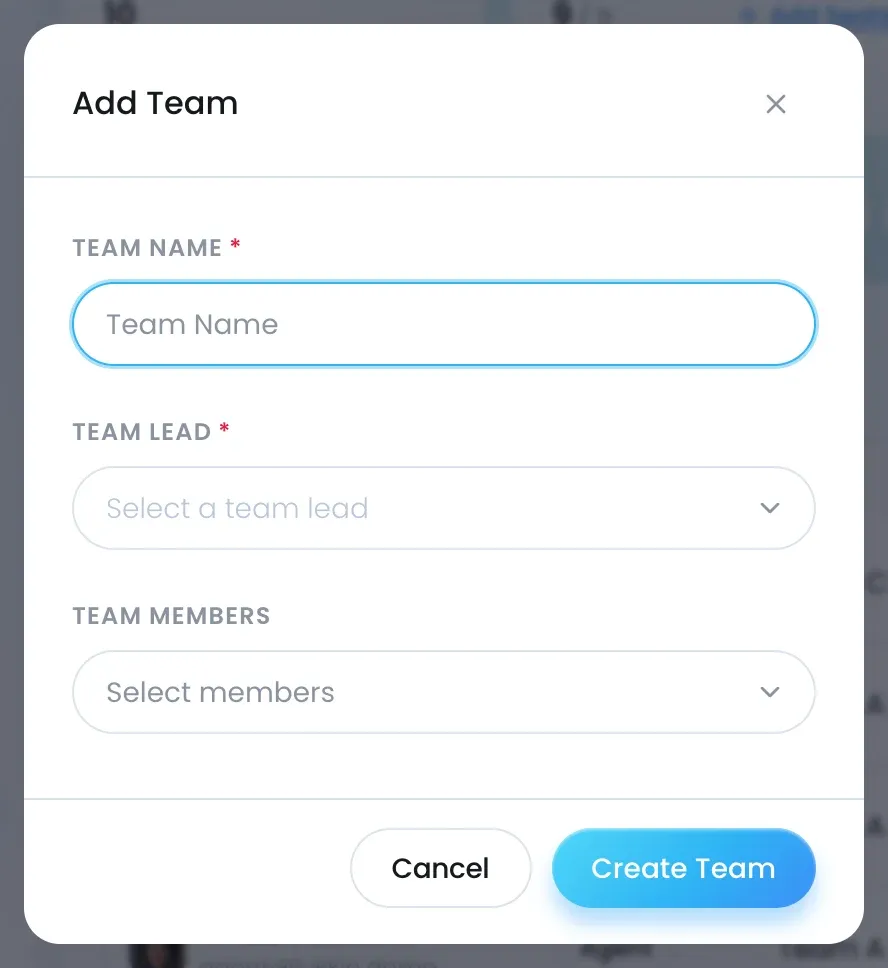
The team appears as its own tab with a member count. Open the tab to add more people, rename the team or delete it. A Team Lead’s dashboard and contact lists cover the members of the teams they lead, and update as soon as membership changes.
Choose the right role
Roles live in Settings → Roles. The four built-in roles can’t be renamed; you can add your own with + Add Custom Role.
| Role | Sees by default | Typical use |
|---|---|---|
| Super Admin | Every contact and deal in the agency (All Users) | Owners, operations |
| Team Lead | Their own records plus their teams’ (Own + Team) | Team managers |
| Agent | Only their own records (Own only), plus anything shared with them | Sales and leasing agents |
| Viewer | Read-only access | Assistants, finance |
Listings and properties are always shared with everyone, whatever the role.
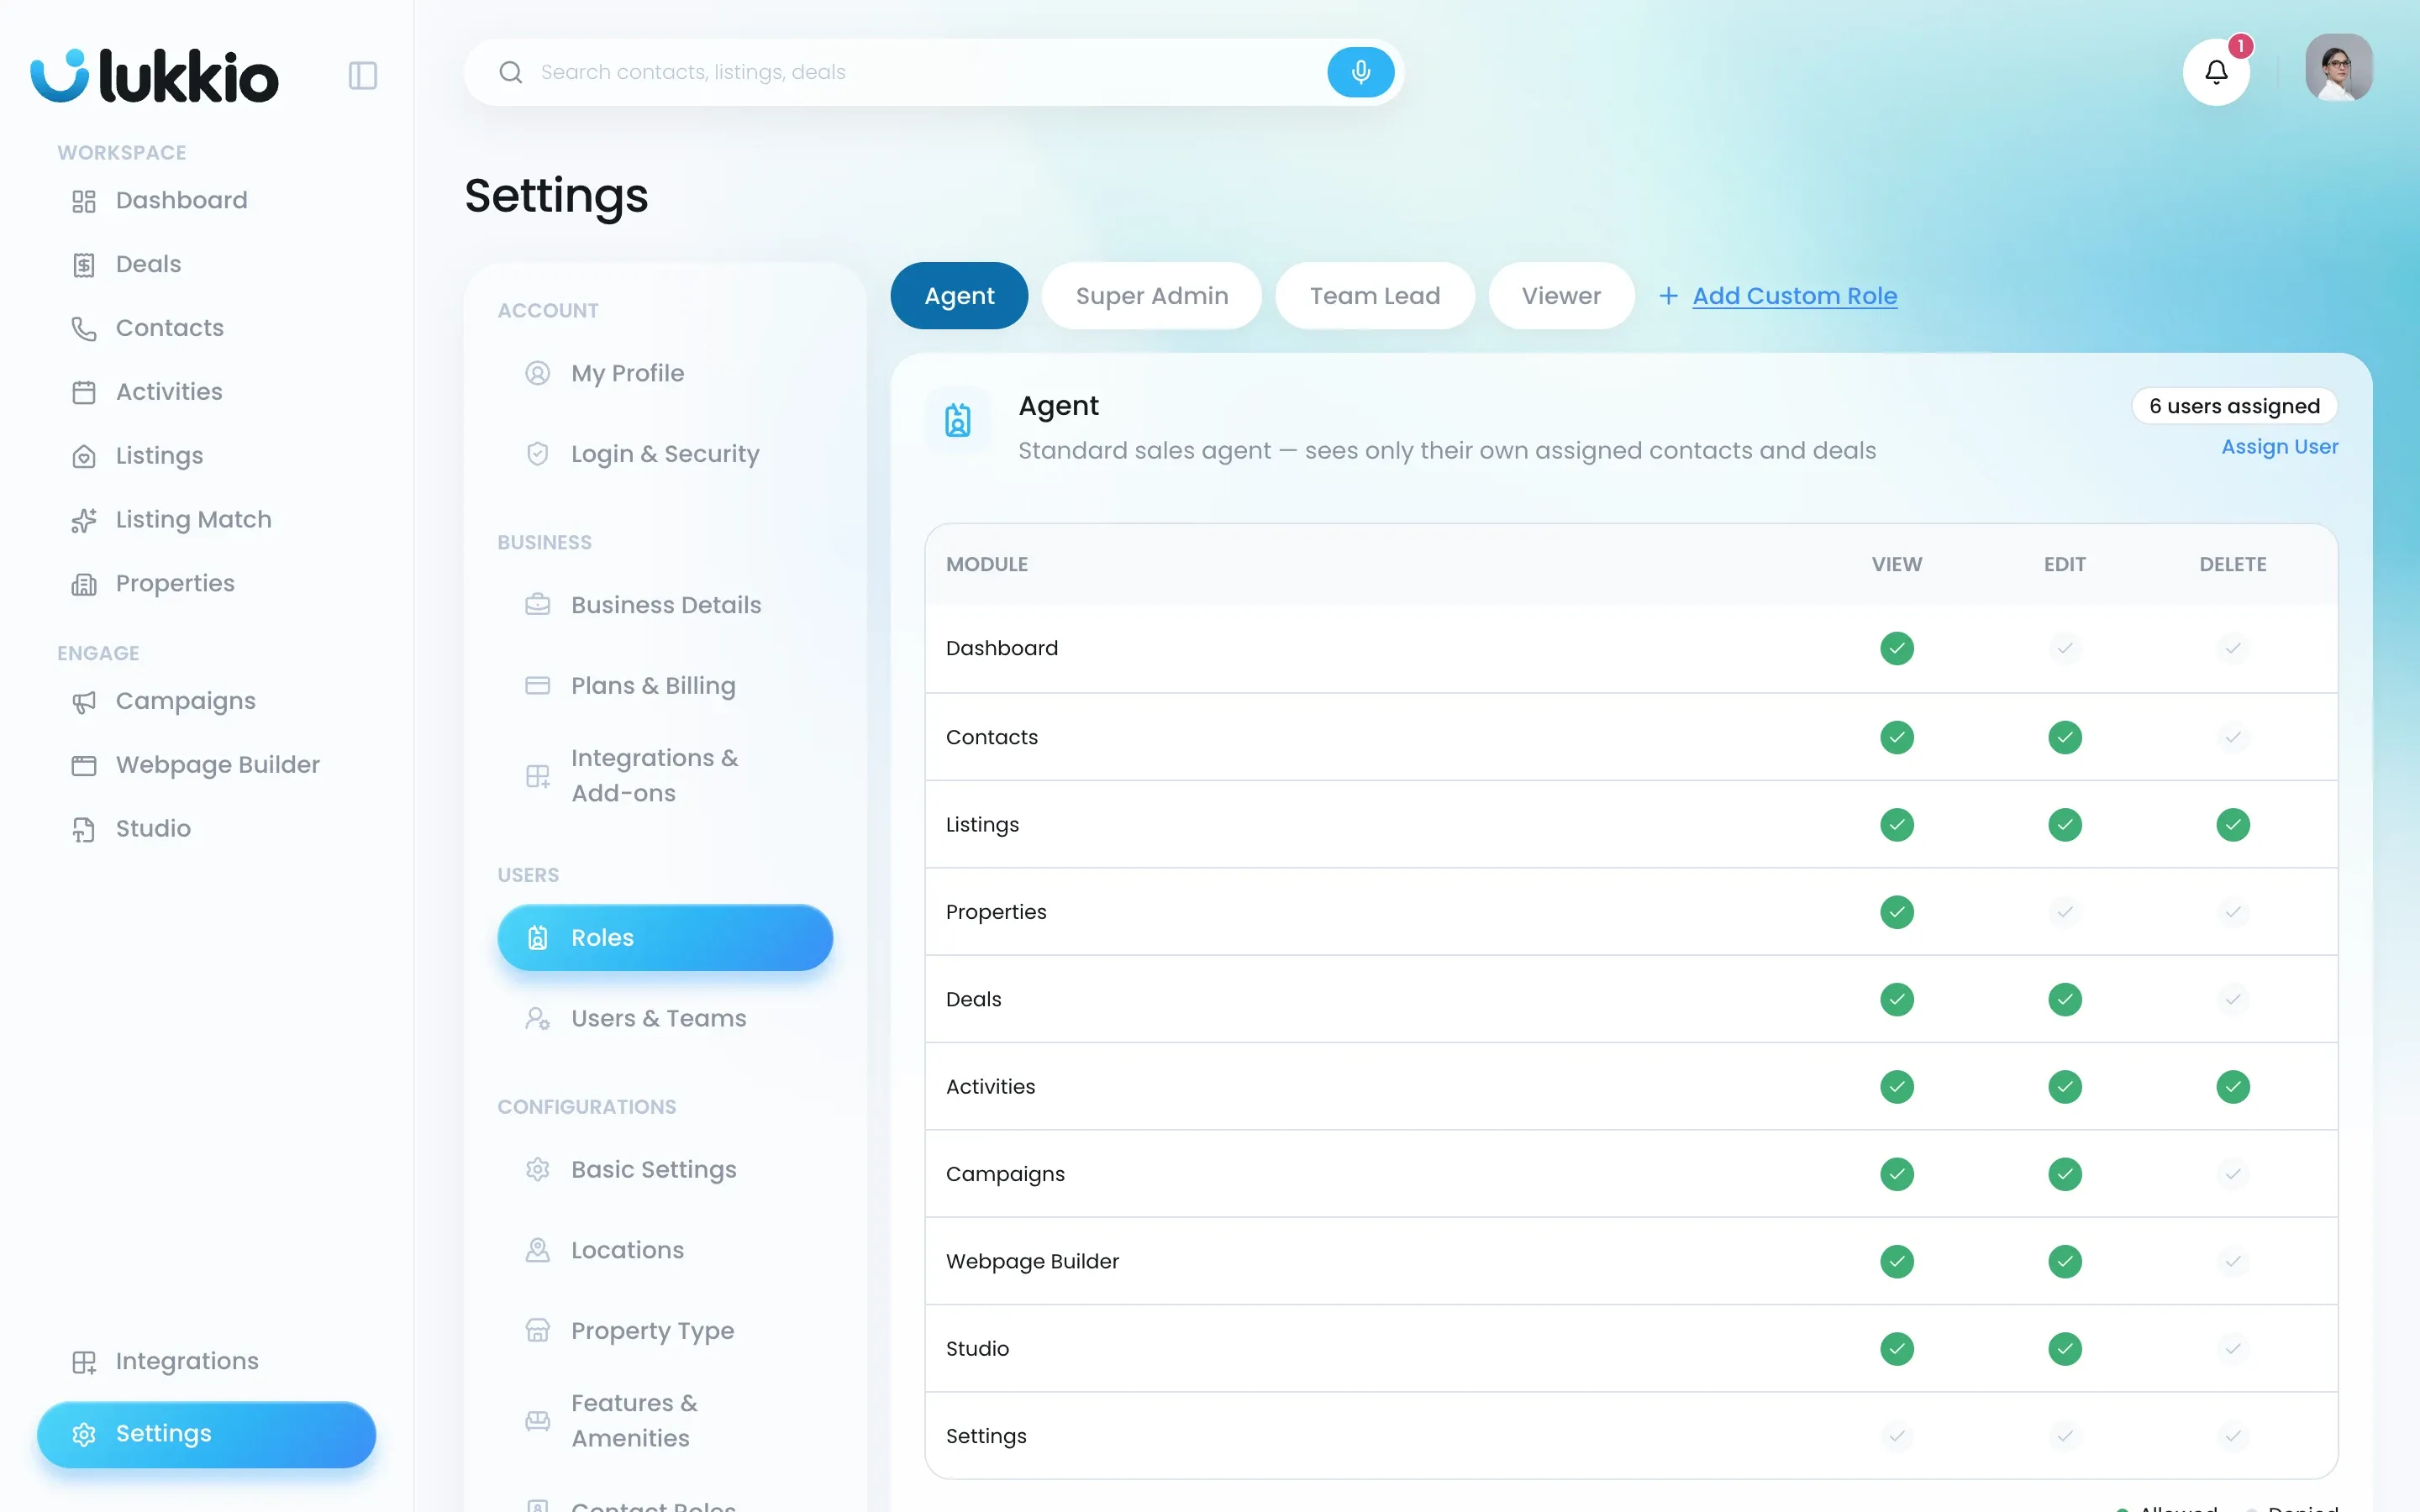
To change someone’s role later, open their row’s ⋯ menu and choose Edit. The same menu has Deactivate, Reset Password and Delete. See Roles explained: Super Admin, Team Lead, Agent, Viewer for what each role can do module by module, and Data visibility and “Request access” for how sharing works around it.
Check what happened
- The new person appears in the user table with an Active status, their role badge, their team and a Visibility column that mirrors the role.
- The Total Users and Seats Used cards update.
- Deleting a user removes the user only: their contacts, deals and other records stay in Lukkio and aren’t handed to anyone else. To stop someone signing in but keep everything as it is, use Deactivate from the row’s ⋯ menu — it also frees their seat.