
The four built-in roles suit most agencies. Create a custom role when a group of people needs something in between: a marketing coordinator who edits listings and campaigns but never sees deals, or an office manager who runs Settings without touching client records.
Before you start
- You are a Super Admin, or your role has the Role permission. Only they can open Settings → Roles.
- Decide per module whether the role can view, add, edit or delete records there.
Create the role
- Open Settings → Roles.
- Click + Add custom role next to the role tabs.
- Type a Name of Role, and a Description if you want one.
- Click Confirm. The new role opens as its own tab.
A new role starts with no permissions. Switch on what it needs. The name cannot be changed afterwards, so pick it carefully.
Set the module permissions
- Stay on the new role’s tab.
- For each module, click the circle under View, Add, Edit or Delete. Green means allowed, grey means denied. Config and Billing have View and Edit only.
- Click Save Permission.
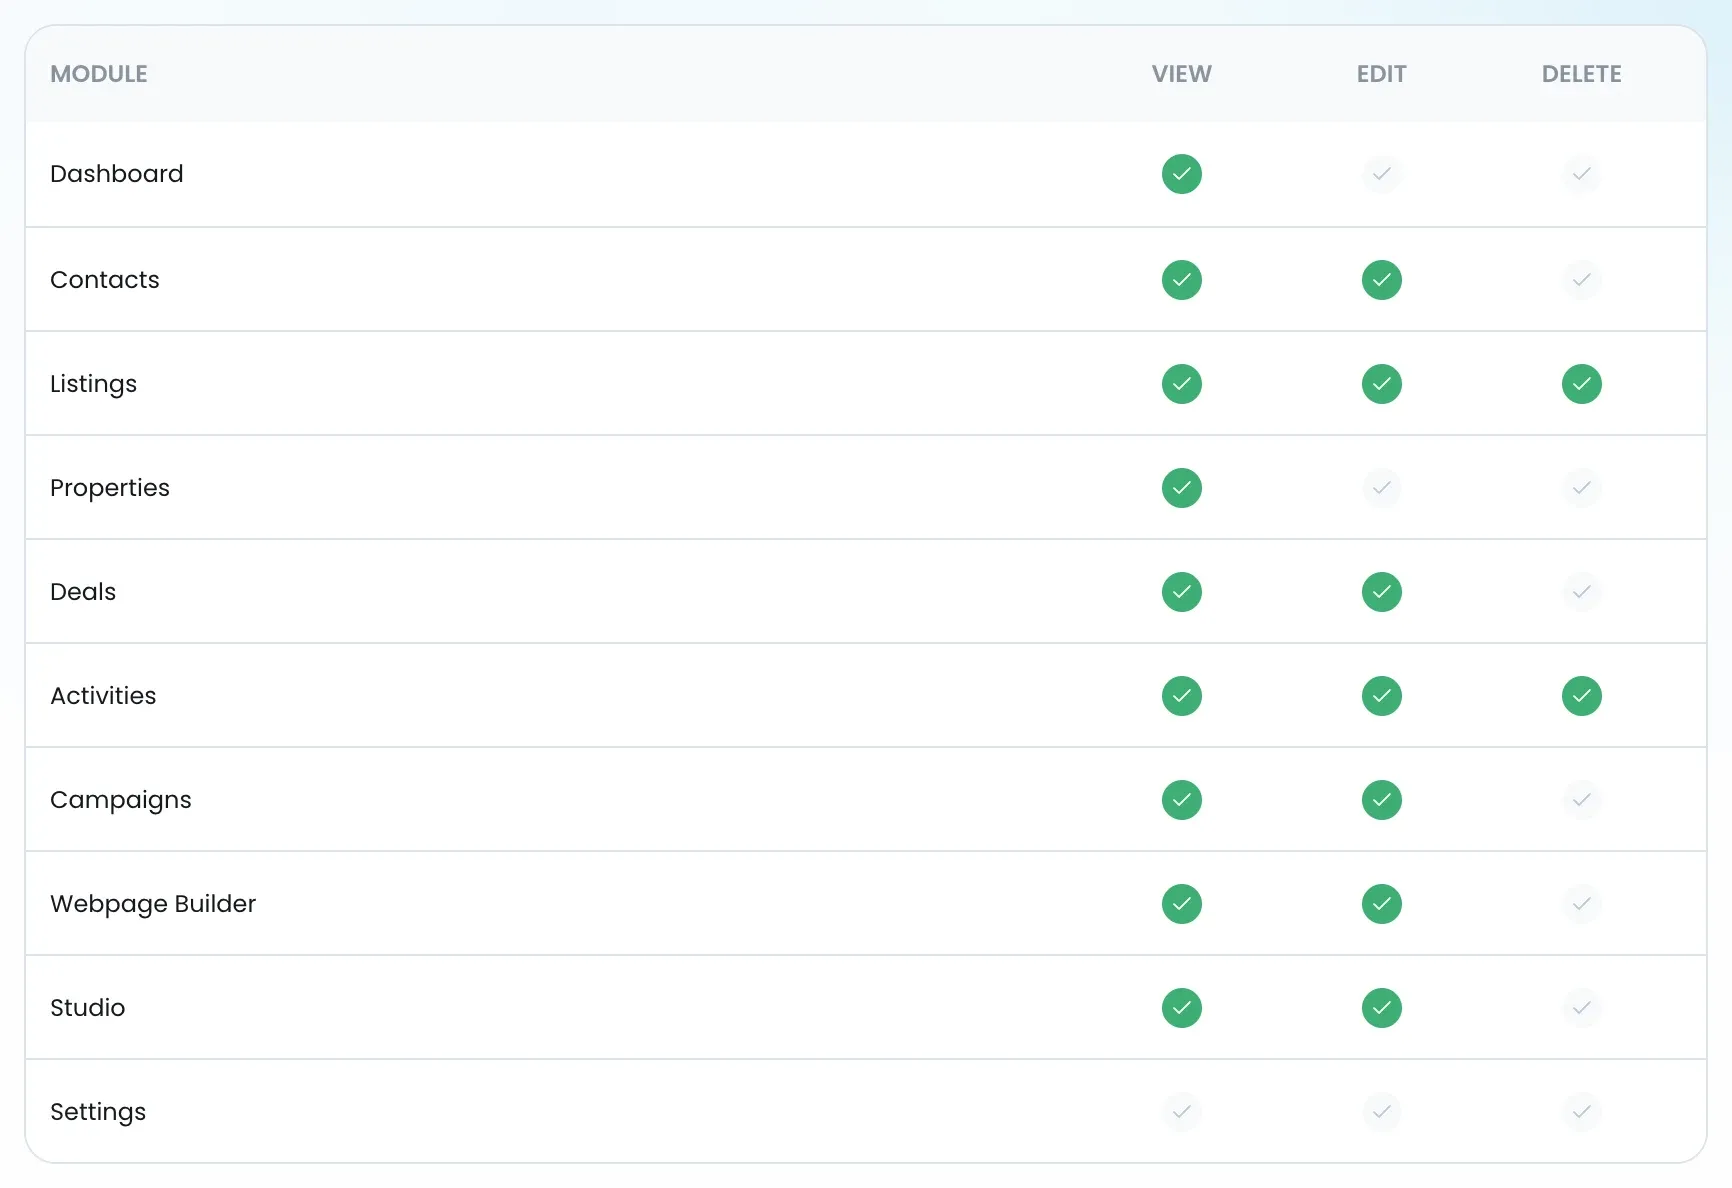
Reset to Default puts the role back to the way it started.
Set the data visibility
- Scroll to Data Visibility.
- Under Contacts & Deals, choose Own Only, Own + Team or All Users.
- Click Save Visibility.
Listing & Properties is fixed to Always shared with all users and cannot be changed per role.
Assign people to the role
- Open Settings → Users & Teams and find the person, with search or the Filter by Role dropdown.
- On the user you want to move, open the ⋯ menu and choose Edit. The menu also has Deactivate, Reset Password and Delete.
- Pick the new Role and save.
When you add a new user, the Role dropdown in Add User lists custom roles alongside the built-in ones.
Check what happened
- The role tab shows how many users are assigned.
- Each user’s row on Users & Teams shows the new role badge and the visibility that comes with it.
- Open Settings → Roles again later and the tab is still there, so you can adjust the role as the job changes.