A listing is the record every portal, campaign and sales sheet reads from, so it’s worth getting the first one complete. The form is three steps in one window: the facts, the details and photos, then commission and where to publish.
Before you start
- The price, size, floor and unit, and the permit number where your market needs one.
- Photos as JPG or PNG, up to 20 of them and 2 MB each.
- Optional: the landlord already saved as a contact, so you can link them.
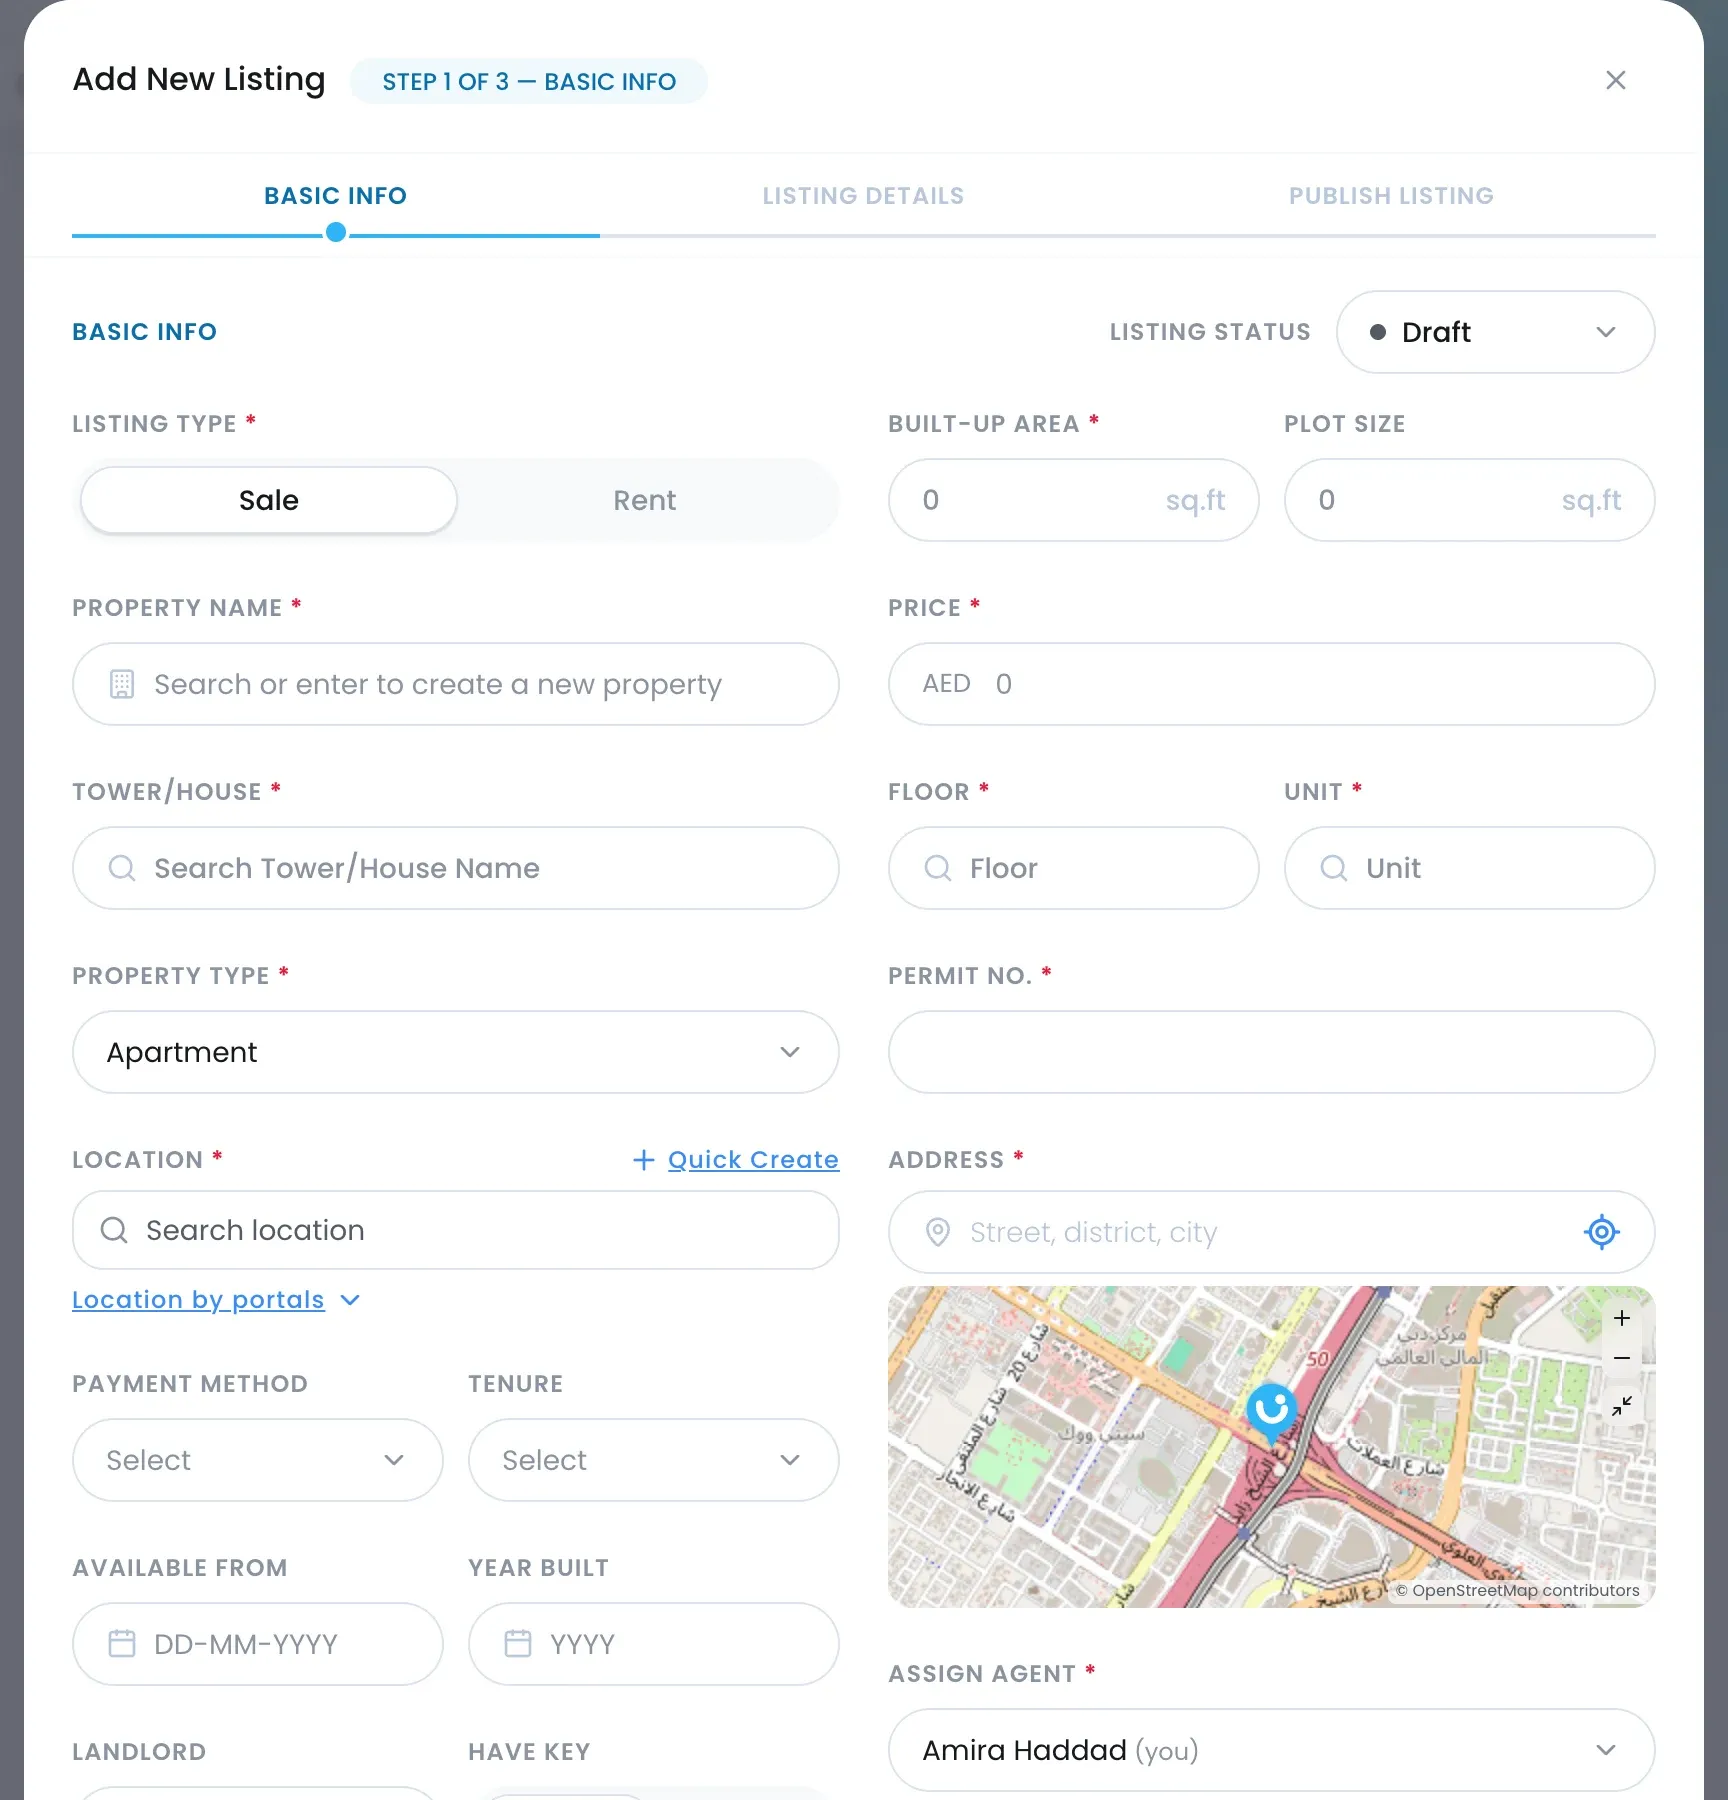
Step 1 of 3: Basic Info
-
Open Listings and click Create Listing.
-
Choose the Listing Type: Sale or Rent. A rent listing also asks for the Payment Frequency and Number of Cheques. You can’t change the Listing Type after the listing is created.
-
Listing Status starts on Draft; set it to Active when you’re ready to publish. A draft isn’t checked for required fields.
-
Type the Property Name. Pick an existing property, or press Enter to create a new one.
-
Fill in the fields marked with a red asterisk: Tower/ House, Property Type, Location, Built-up Area, Price, Floor, Unit, Permit Number, Address and Assigned Agent.
-
Add anything else you know: Payment Method, Tenure, Available From, Year Built, Completion Status, Landlord, Have Key and Developer.
-
Click Save & Next.
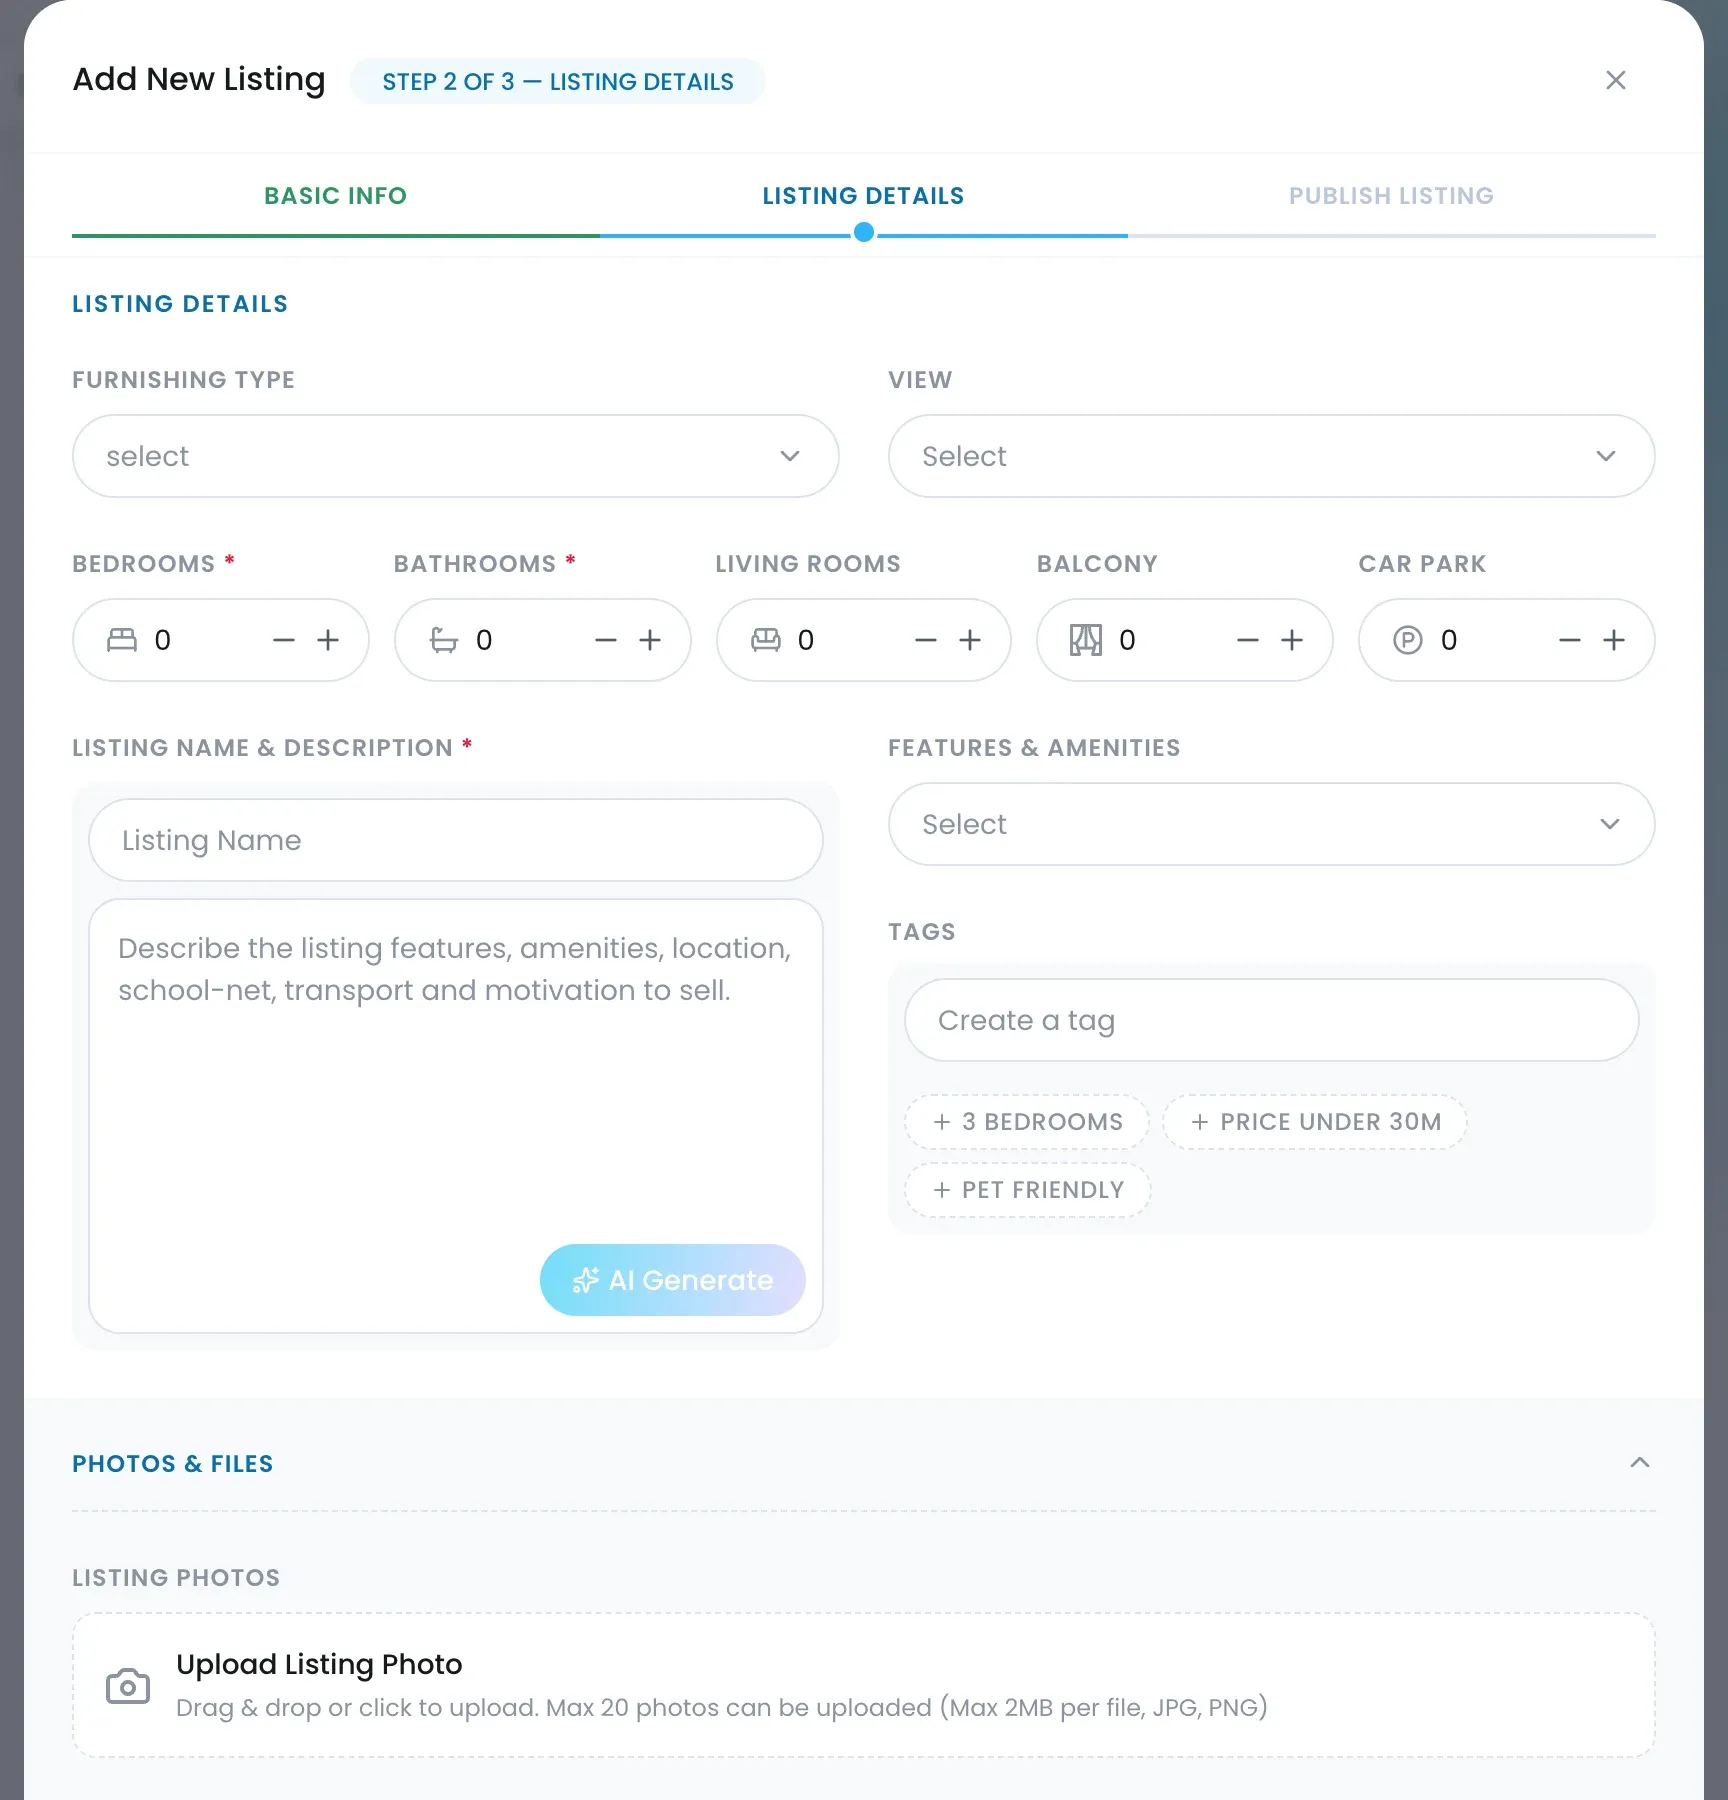
Step 2 of 3: Listing Details
- Set Bedrooms and Bathrooms with the steppers. Add Living Rooms, Balcony and Car Park if relevant, plus Furnishing Type and View.
- Under Listing Name & Description, type a name and describe the home. Or click AI Generate to have the description drafted from the facts you’ve entered, then edit the result before you move on. See Write a listing title and description with AI.
- Pick Features & Amenities and add Tags if your team uses them.
- Under Photos & Files, add your listing photos. See Add listing photos.
- Click Save & Next.
Step 3 of 3: Publish Listing
- Choose the Commission Type, Percentage or Fixed Amount, and enter the Commission Rate and Deposit.
- Check the Agent Split; add a Co-Agent to share it.
- Under Distribution Channels, switch on Property Finder, Bayut or Dubizzle.
- Click Publish.
Where it shows up
- Listings, in card or table view, with a status chip and an icon for each channel you switched on. See Find, sort and filter your listings.
- The New Listings strip at the bottom of the dashboard, under “Added this week”.
- Listing Match, where it’s scored against your contacts as soon as it’s saved.
- On each portal, once approved, with a status of Published or Unpublished.